My Jaguar XJC Project
The Jaguar XJC and its sister model the Daimler Sovereign Coupe are the rarest of all Jaguar models with a very short production life of 1975 - 1978. Yet for me and many others around the world it is one of the most beautiful cars ever produced by Jaguar.
My love affair of this model is evidenced on other pages of this site. My first purchase was the 1977 XJC that had been converted to a drophead. This was a great car but I longed for the real thing which led me to the purchase of the 1977 Daimler Sovereign Coupe. This is a lovely, mostly original car that I thoroughly enjoy. But I have for some time had a yearning to experiment with some mild customising of an XJC. So the S Type was sold and this journey has begun in earnest. I intend recording this projects progress in the following photos and comments. I hope others might follow the build and get some enjoyment from it.
In addition to the photographic record below, the story of this Restomod XJC can be found in detail HERE
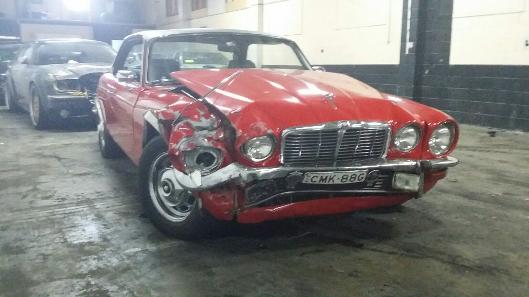
1. I became aware of a local Jaguar XJC languishing in a shed not far from where I live. To cut a long story short it took me two years to finally convince the owner to part with the car. It is a 1978 car and supposedly one of the last three delivered new to Australia (unverified at this stage). A 4.2 ltr. straight six, OHC, and has been converted to a Manual overdrive using a standard Jaguar box.
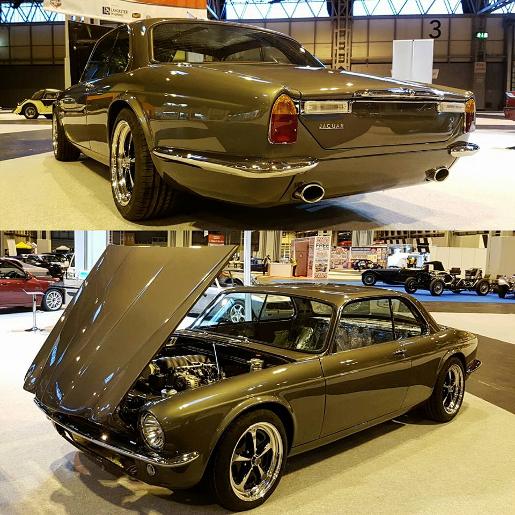
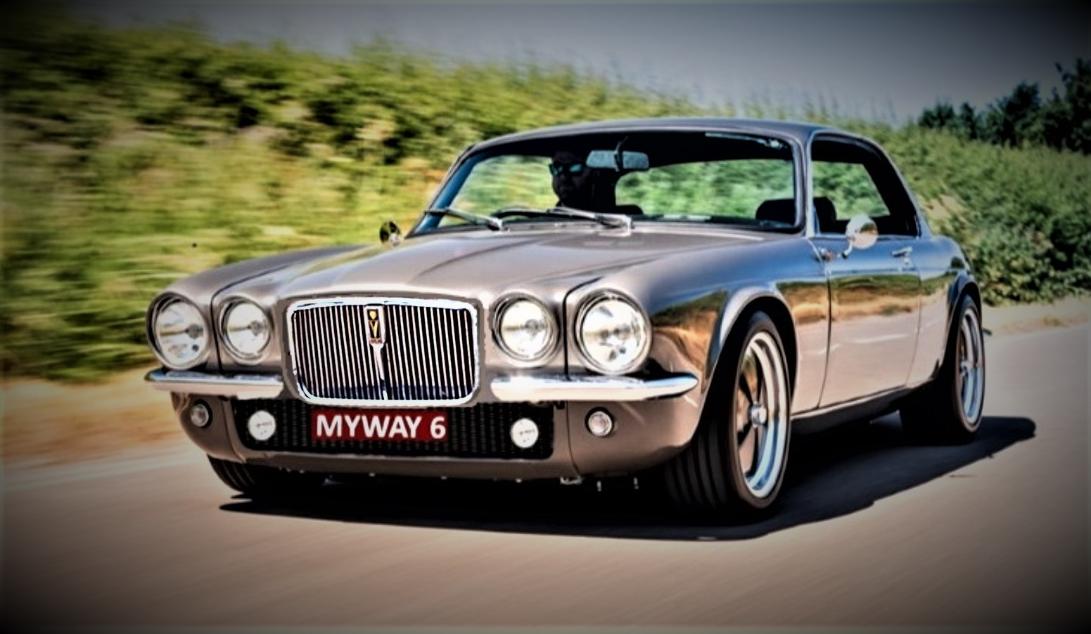
3. A current project in the UK by Retropower caught my attention and fired up my imagination. Mechanically I could not possibly consider the upgrades and improvements of this project, however the customisation being employed was in my opinion sympathetic and inspiring .
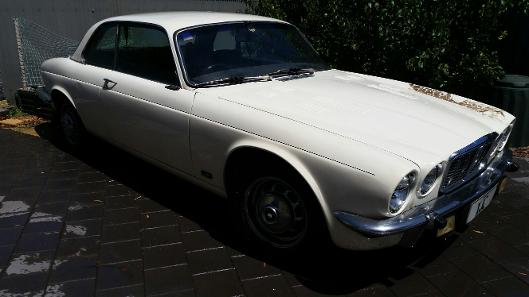
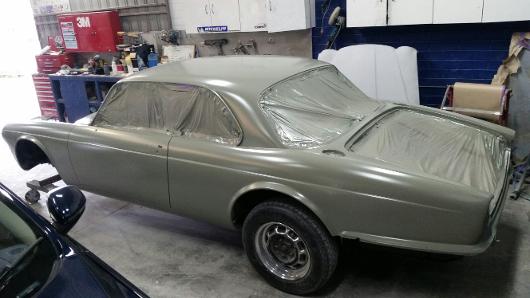
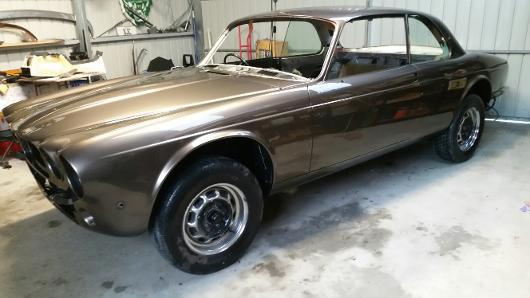
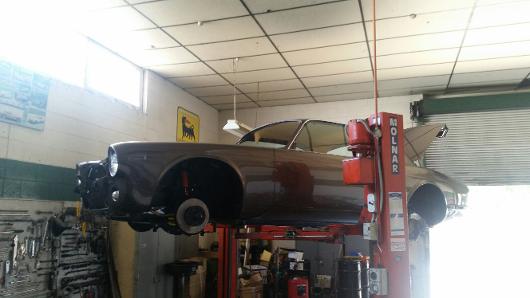
2. Once home a quick wash and it was looking good already but I was well aware that despite its relatively straight and clean appearance, and the previous owners assurances that there was very little rust to be attended to, I suspected that lurking beneath the paint there would be many surprises. The car had not been run for over 14 years .
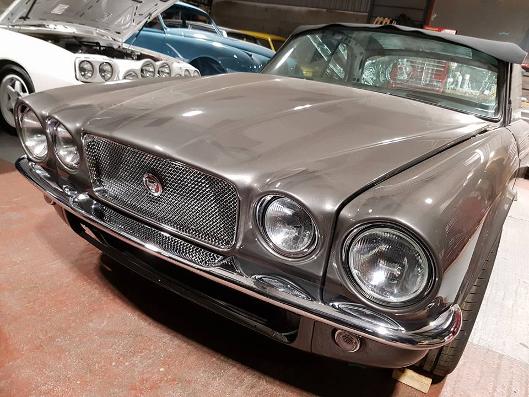
4. The clean lines with over riders removed, the mesh grill and the single indicator lights all contributed to the simplicity of style I was looking for. The 17" American Racing style wheels with their nod to wheels of that period and in particular the popular Kent Alloys gave the car a modern look without the "over the top" appearance of many modern mag wheels. The treatment to the rear bumper was in my opinion fantastic but was more than I was prepared to undertake. Even the colour was appealing,
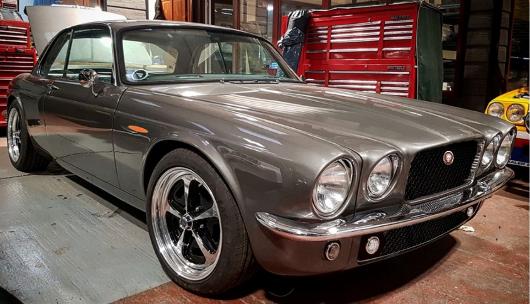
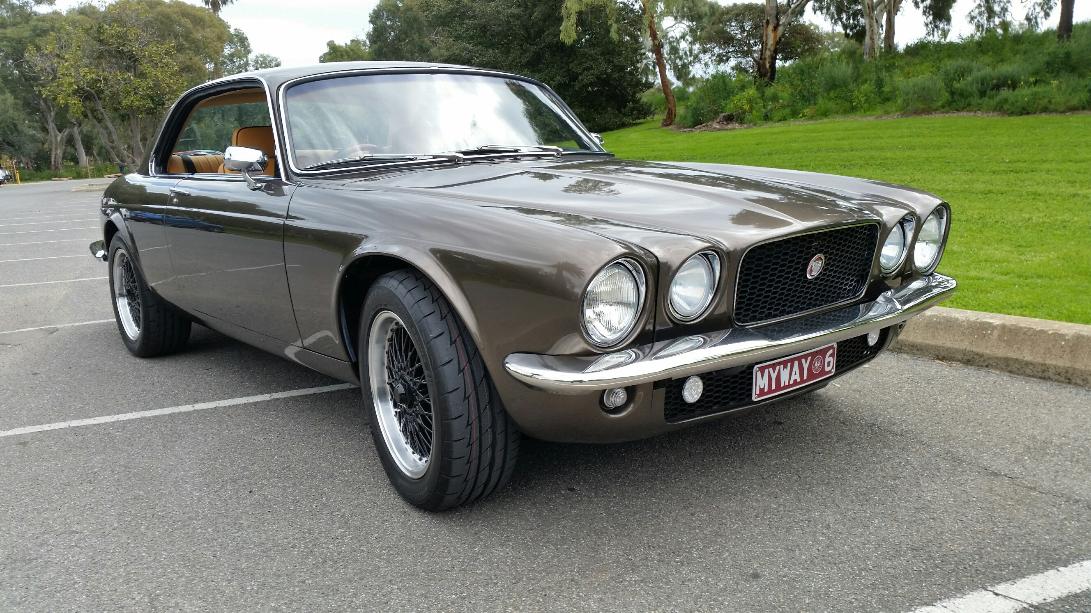
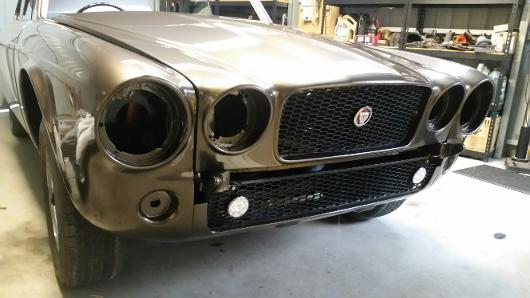
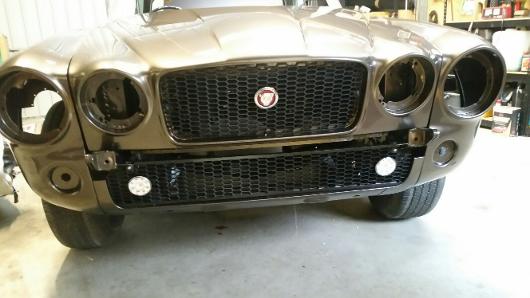
5. I decided to bring some of my own ideas to the design. So with a little photo shopping, I have introduced a black mesh grill, both upper and lower, with DRLs introduced to the lower grill panel. The side marker / indicator lights are of XJ8 style, but on second thoughts will not be introduced.
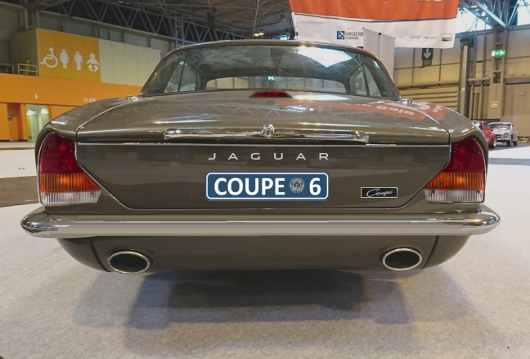
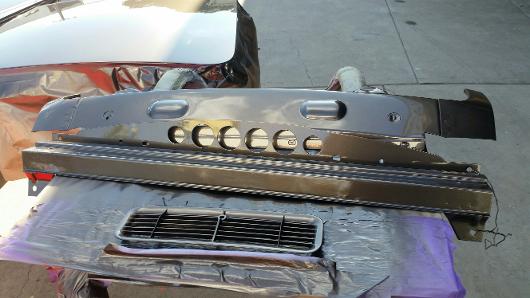
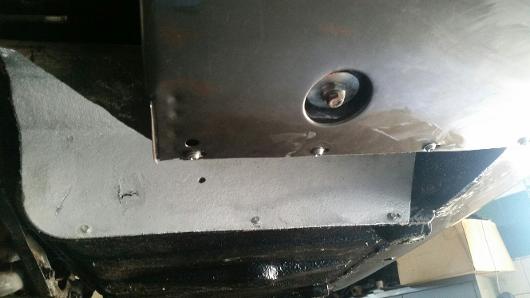
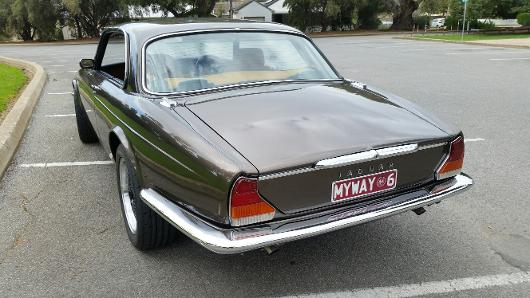
6. As this photo shows I plan to remove the over-riders at the rear. Not sure how I will overcome the split bumper problem yet. Likely solution will be to use a stainless steel cover strip over the joins until I can source a one piece Series 1 bumper. Utilising a Series 3 boot lid with the slimline plinth and the series 3 tail lights will give me a clean and uncluttered look with single more modern "Jaguar" badge. So the plan is now in motion, with a lot of hard work ahead.
7. At this point in my story there is a tragic twist. A fellow XJC owner who had been progressively restoring his car over a period of about four years was involved in an unfortunate accident resulting in his car being written off by the insurance company.
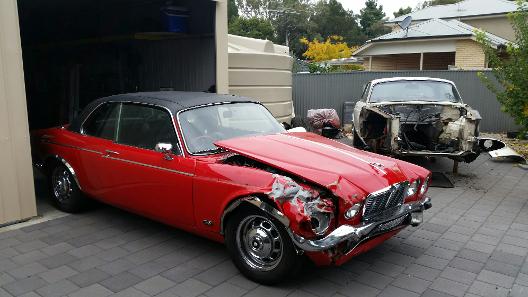
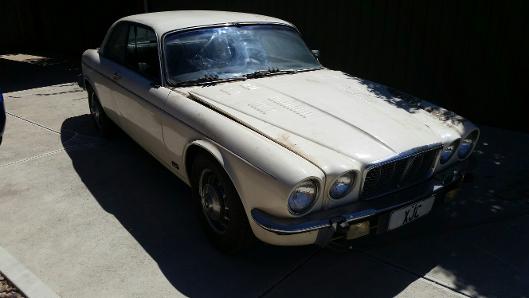
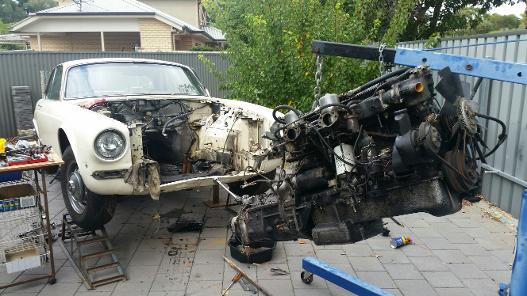
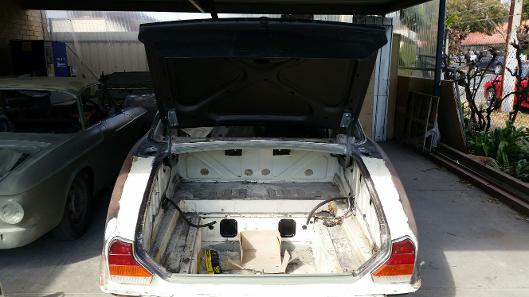
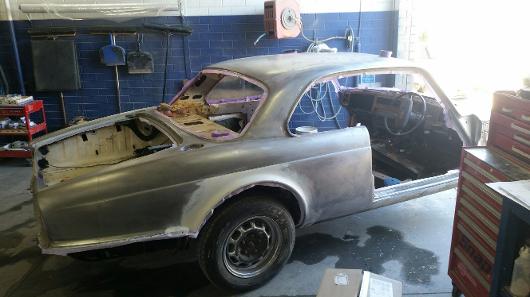
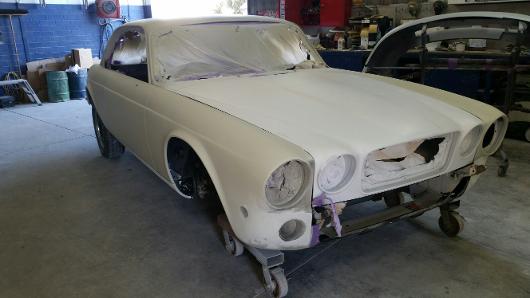
9. I was able to purchase the car and this photo shows it in my yard in front of my partly dismantled project. All the running gear and other parts as requiredwill be transplanted into my project.
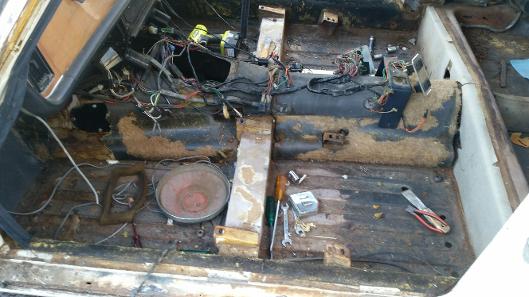
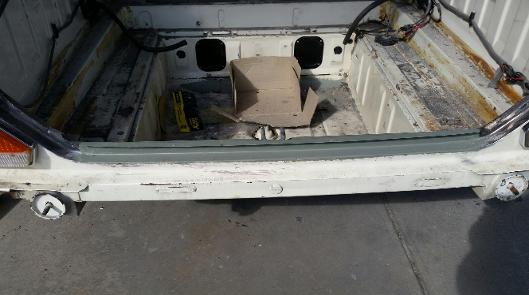
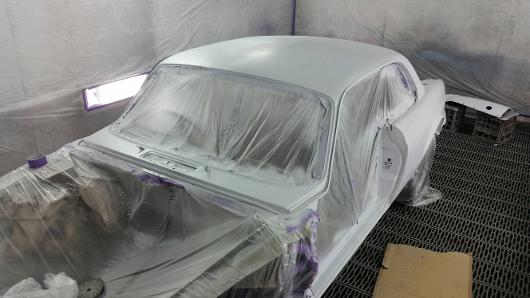
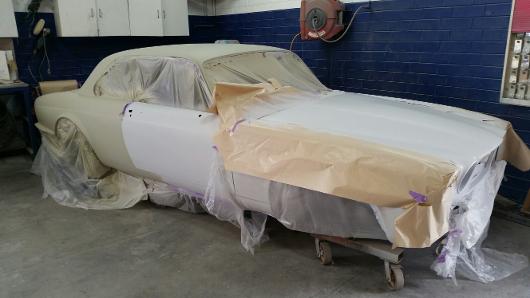
11. July 2017. Interior out getting ready to go to the paint shop.
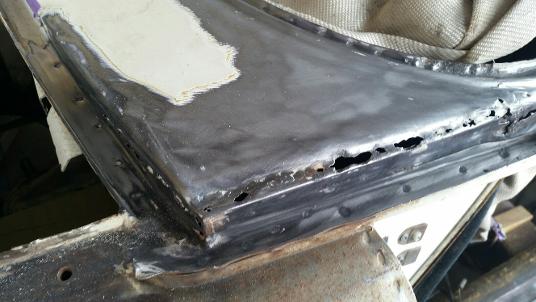
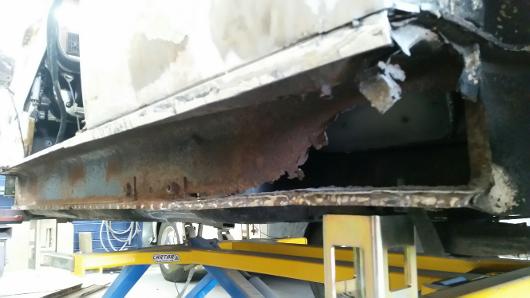
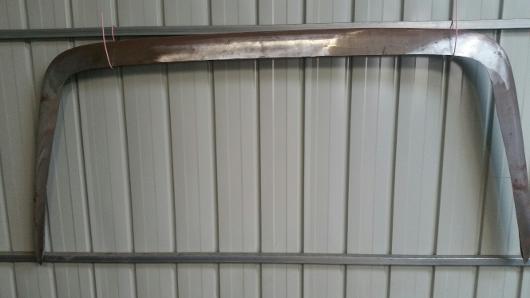
13. Time to find the dreaded tin worm. Both door rubber channels are rusted out.
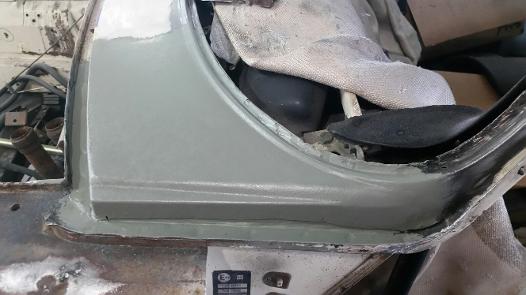
15. Another rust hole lurking below the bog.
17. Dodgey work exposed, covered in bog
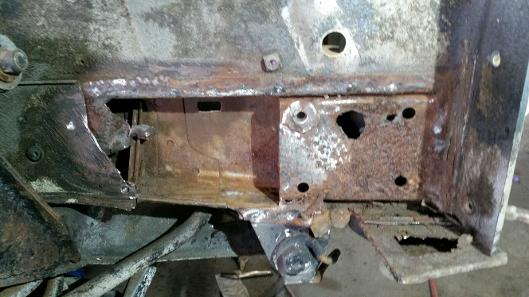
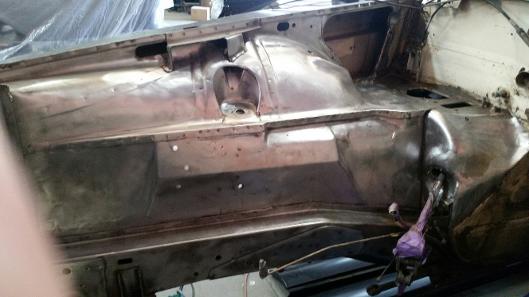
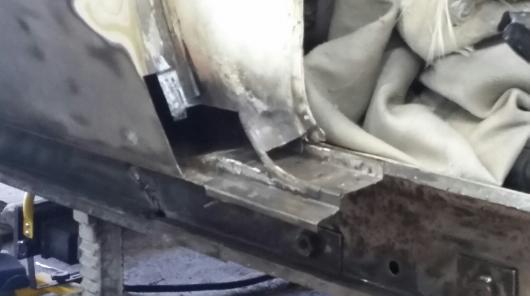
19. The forward chassis rail often conceals real issues behind the inner guard panel.
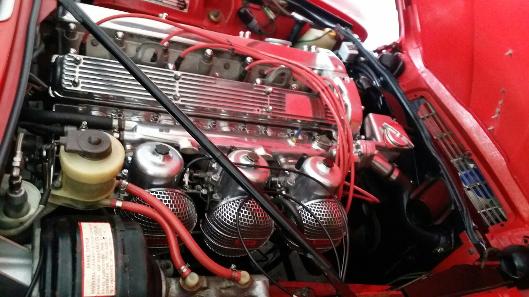
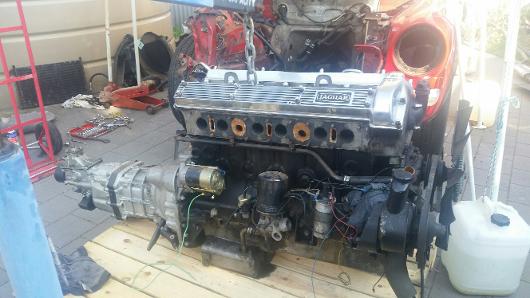
8. This picture shows some of the detail he went to in restoring this car. Fitted with triple carbs, ceramic coated extractors,a light weight flywheel, new clutch, 5 speed Toyota box, rebuilt front and rear suspension, upgraded interior. So it was that his misfortune became my good fortune.
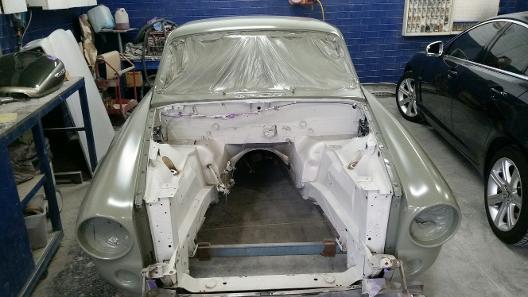
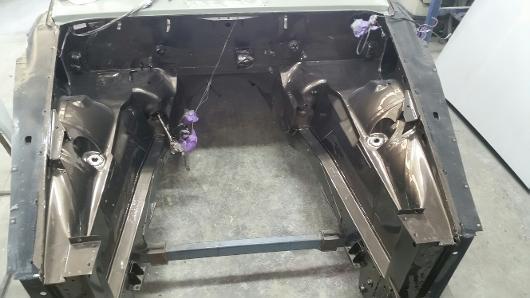
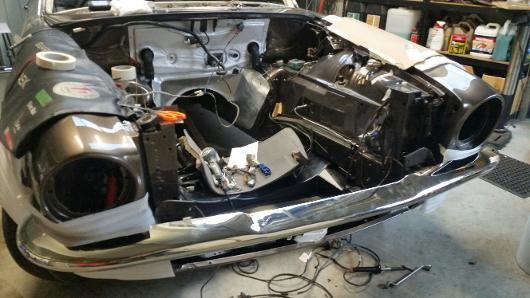
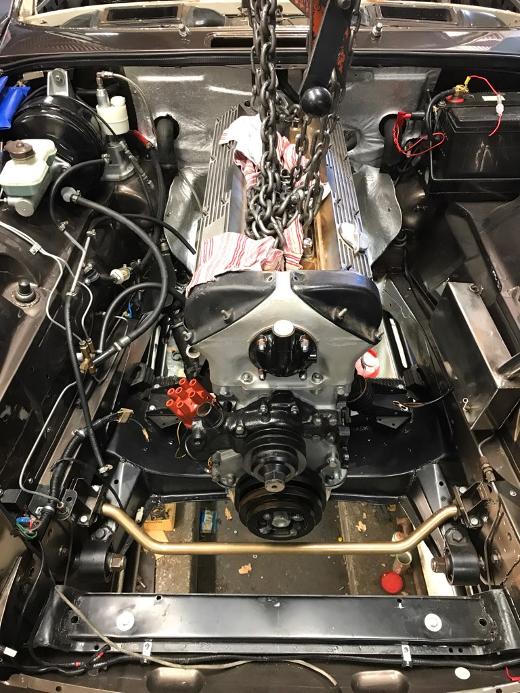
10. And so, the real fun begins! Engine and gearbox out and engine bay ready to be stripped out. The plan is to get a clean uncluttered appearance to the engine bay.

12. Bonnet, boot lid, front guards and some beaver panels to go off to Minus Paint to be chemically stripped and etch primed. Then off to the paint shop. I have decided not to retain the fluted bonnet that came with the car.
14. Same problem with the lip on the boot
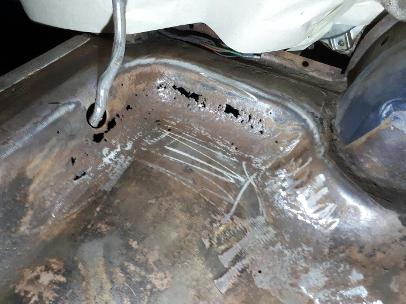
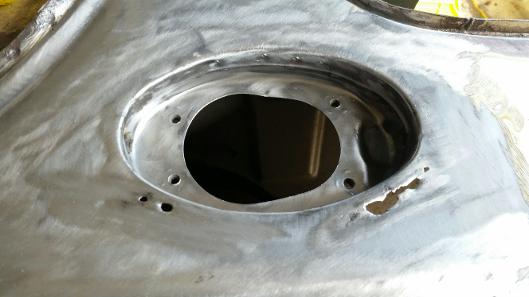
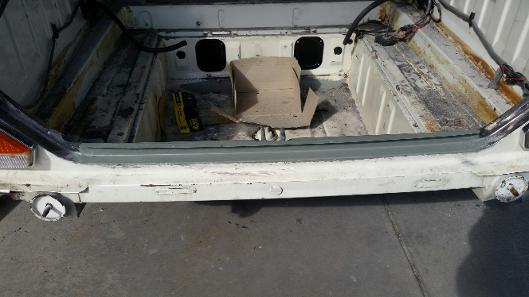
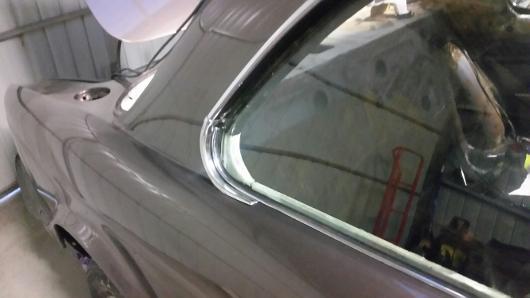
16. A very common Coupe hot spot under the rear seat. Caused by tiny drains below the rear quarter windows that block so easily preventing adequate water drainage.
18. Now that's more like it
20. All good now. So must check the other side as well.
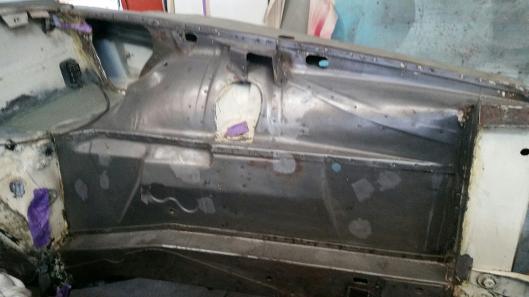
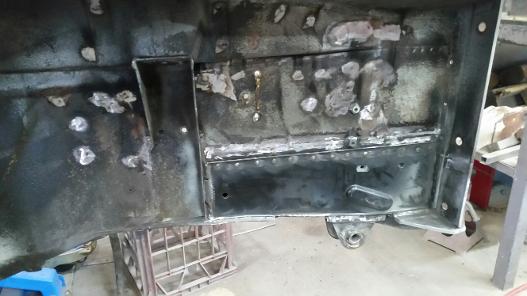
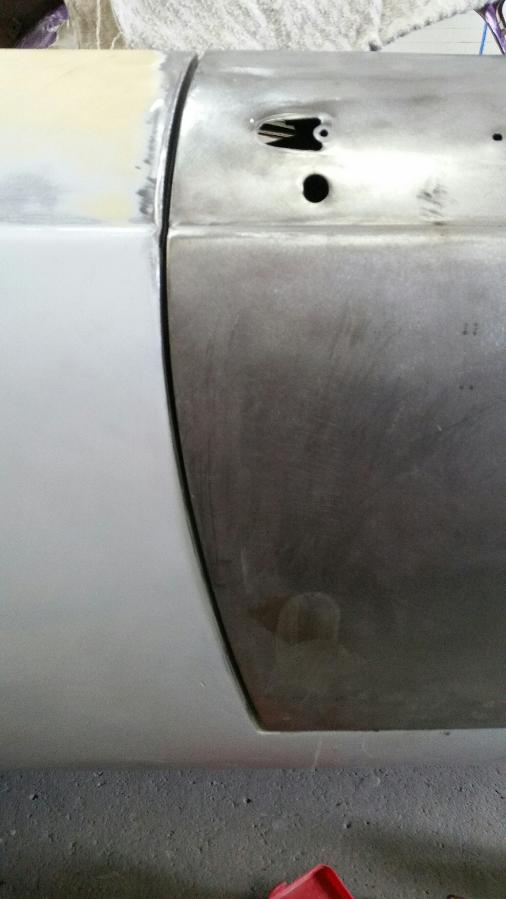
21. Over 40 redundant holes in the inner guard panels of the engine bay welded up. I am looking for a nice clean, uncluttered engine bay. A big ask for a Jaguar engine bay, but we will try.
22. Redundant holes all welded up we are on our way to a much cleaner engine bay.
24. The boot lip that holds the seal rubber was also rotten and has been replaced

26. The rear beaver panel under the boot has been removed and will be replaced. Some rust repairs were necessary here as well.
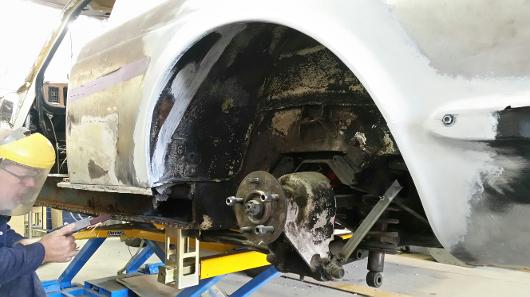
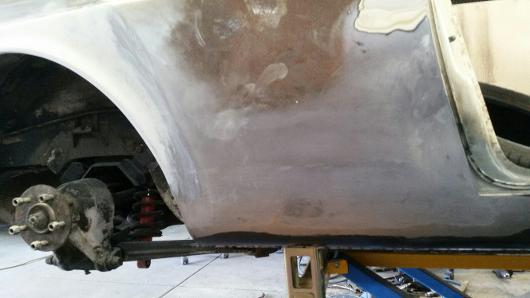
28. On both sides, the cavity below the rear quarter window was rusted as a result of the small drain being blocked.

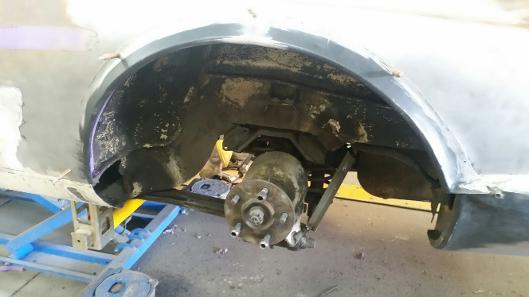
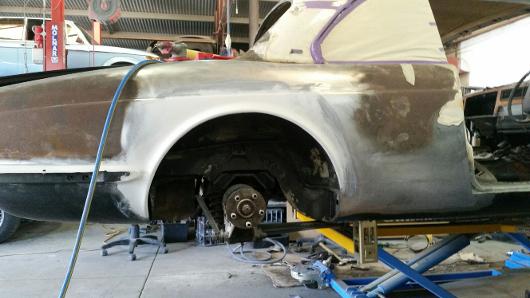
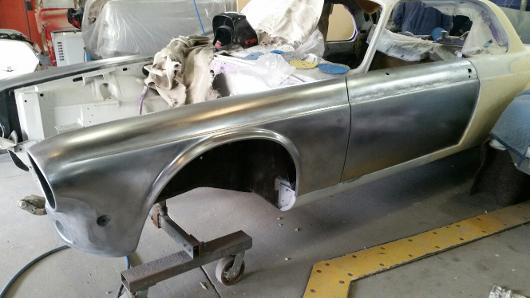
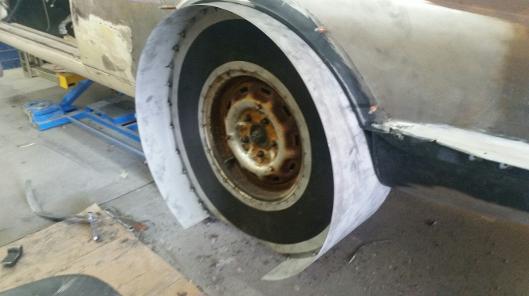
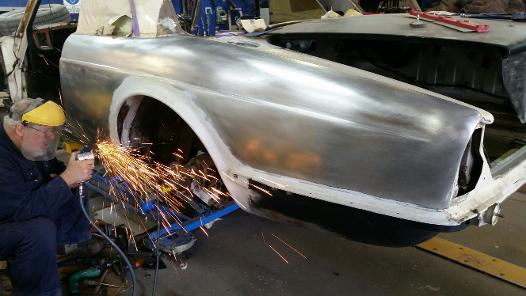
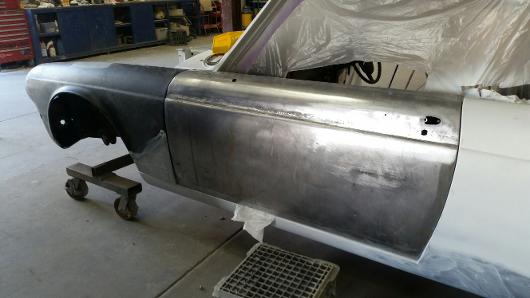
30. A major piece of customising is to change the style and profile of the rear wheel arches to a full round profile hugging the rear tyre. The first step is to remove the rear flare of the guard
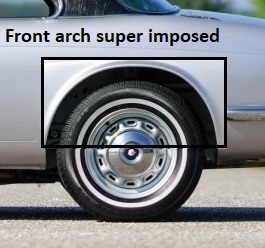
32. As seen in this photo a front arch has been digitally imposed on the rear arch, and it does not form a perfect circle.

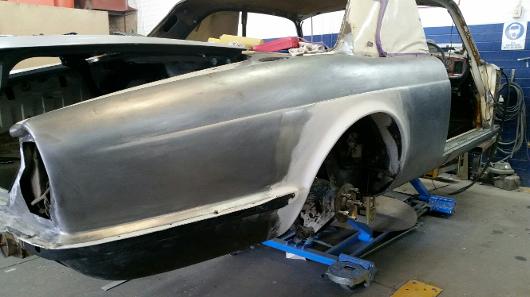
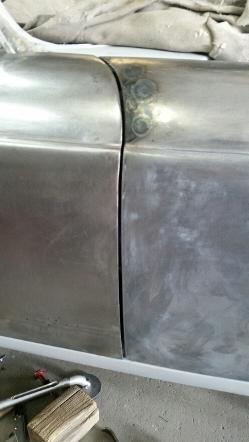
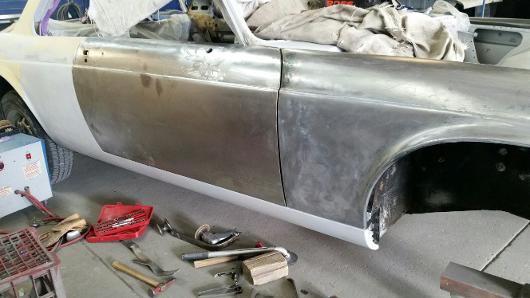
34. With the new arches in place we are well on the way to achieving the desired look.
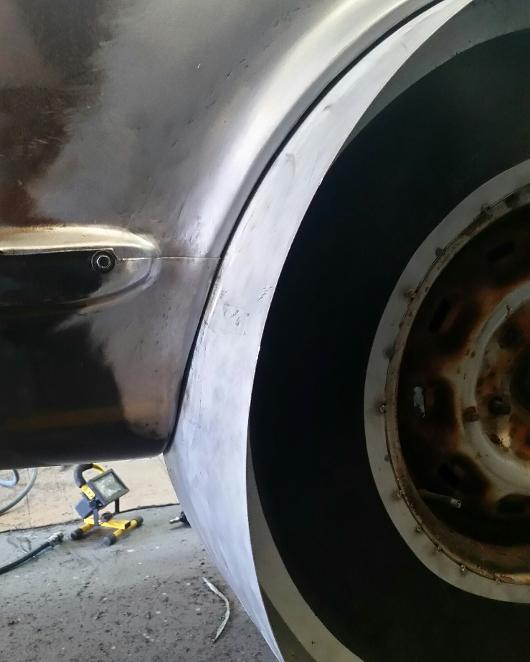
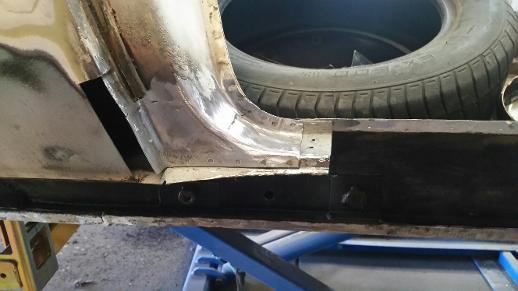
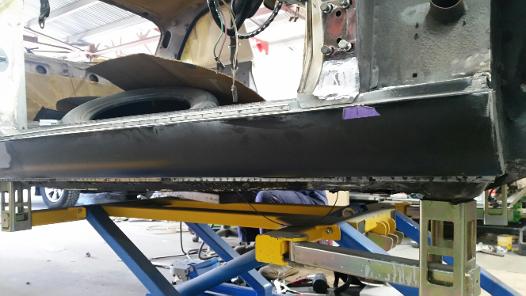
36. A very pleasing result has been achieved by altering the lead edge profile of the under tank panel to ensure the new arch profile continues right through. Great result / work by my tin man.
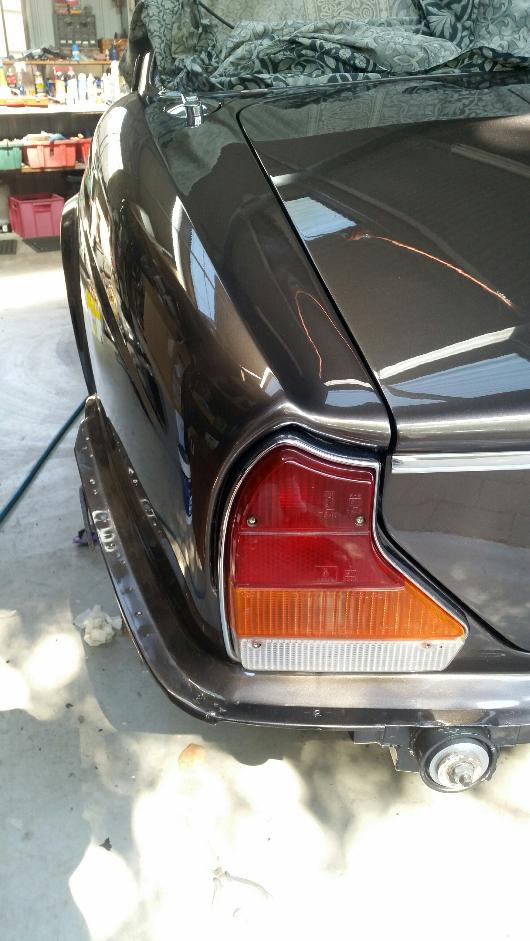
23. series 3 tail lights fitted and a series 3 boot lid fitted. I have rebuilt the hinges to get the full lift back to the boot lid.
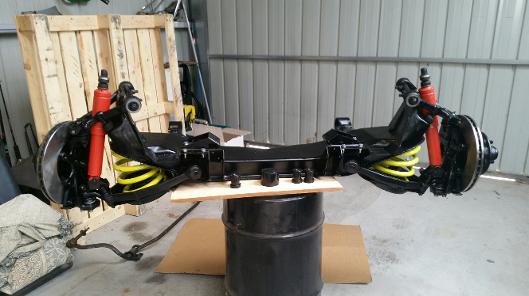
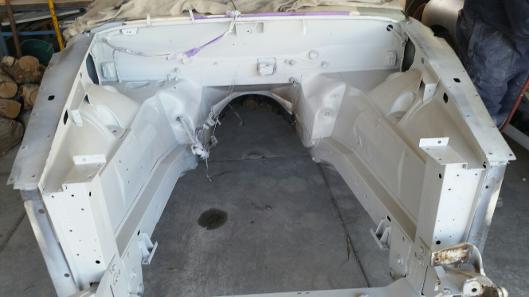
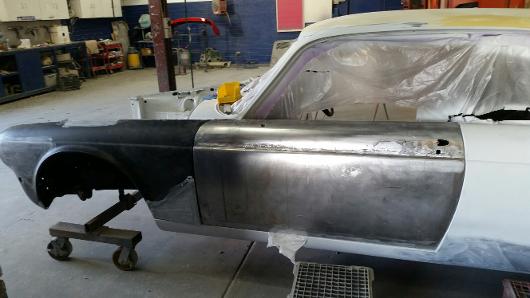
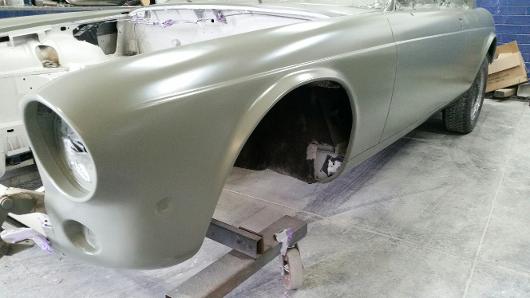
25. Whilst the shell is in the cash shop the front end has been removed and has been rebuilt ready for installation.
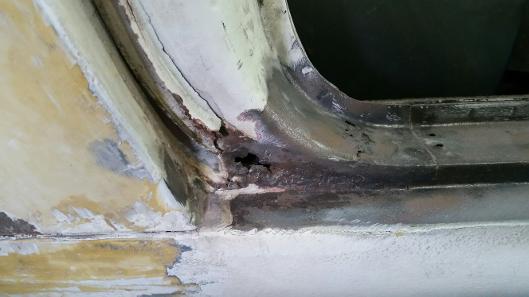
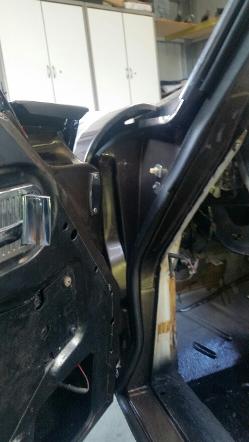
27. At the bottom of both 'B' pillars the tin worm had been busy.
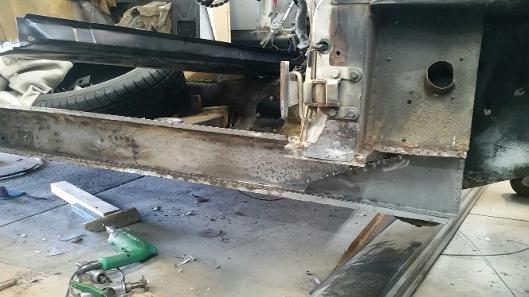
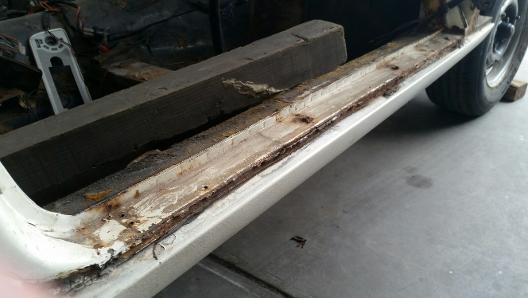
29. Repairs to the inner sills on both sides and replacement of outer sill will be required.
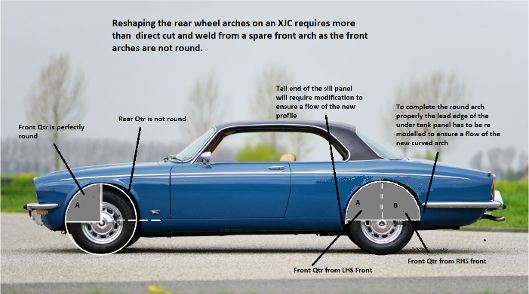
31. My initial idea was to use a cut out from a front guard and weld it into place on the rear. However I soon realised the front guards are themselves not round. Only the front half of the arch is round.
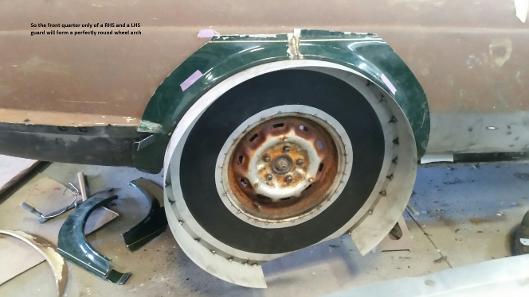
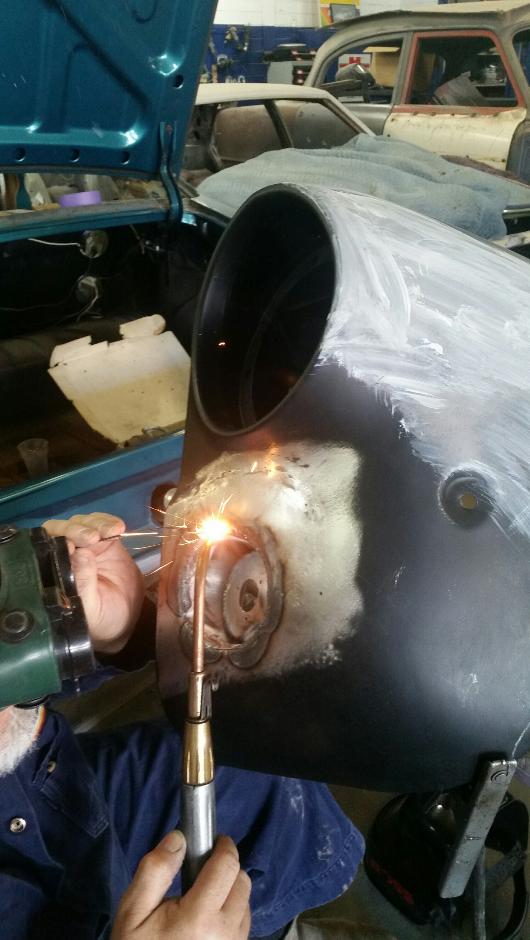
33. The solution was to use just the front half of a LHS series 2 guard and the front half of a RHS series 2 guard which put together gave me a perfect round arch allowing for a 45 mm clearance on 225/55/17 tyres. This photo shows the jig welded to an old rim andused to ensure the correct outcome.
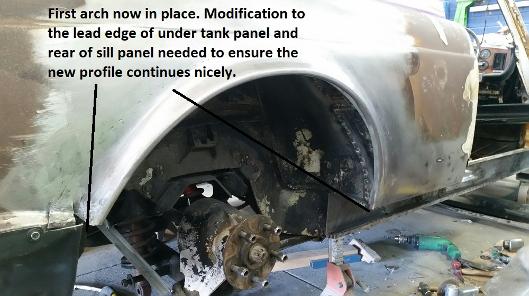
35. To ensure a proper finish with the new profile the lead edge of the under tank panel and rear end of the outer sill panel will need reshaping. But looking good so far!
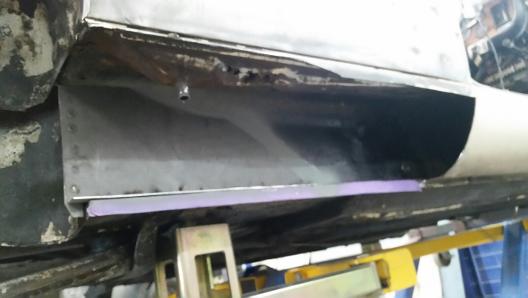
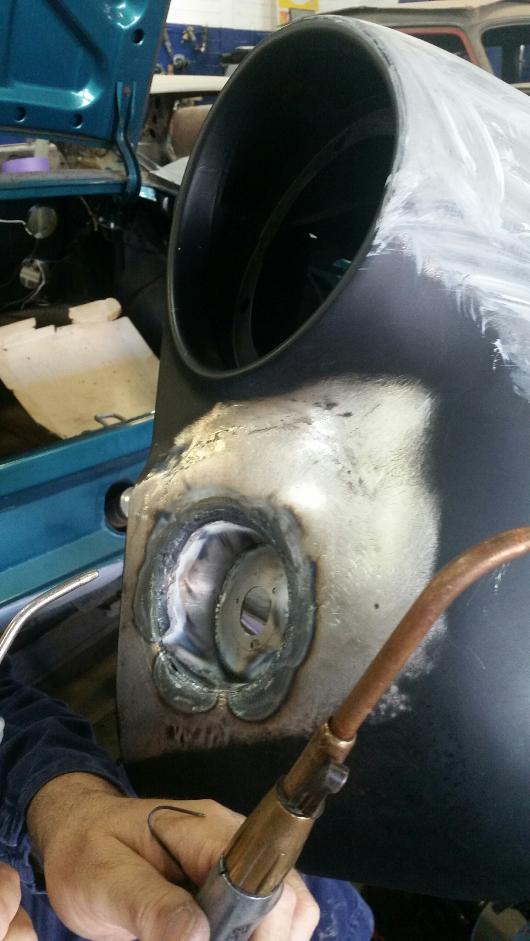
37. The problem caused by the small drain pipes blocking up is solved by installing larger and more direct drainage pipes from below the rear quarter window to the bottom of the new sill panel.
38. With the rust cut out of the base of the 'B' pillar a repair can be made. Getting ready for the new outer sill to be fixed in place.
39. Time to tackle the LHS rear arch. First trialfix looks good
41.. Modified wheel arch RHS complete. Metal finishing about to commence. All bog will be eliminated, some lead wiping will be used to get a clean metal finish.
43. The LHS rear wheel modification is now complete. Very happy with the way the new profile of the wheel arch continues into the under tank panel. Very professional finish.
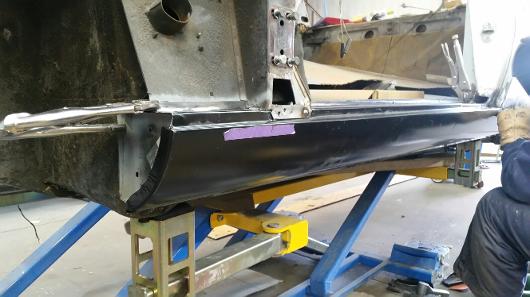
45. The LHS sill is in and almost finished.
47. The RHS rear quarter panel metal finished. Starting to look like a car again, getting excited now!
49. Cusomising the recess for the new front indicator and parking light with dual colour LEDs.
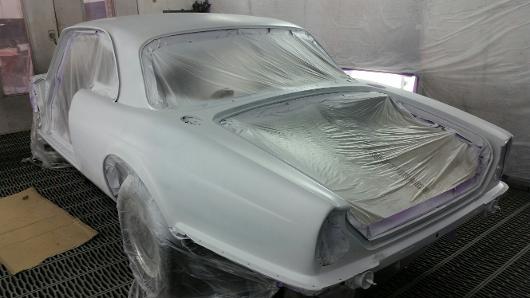
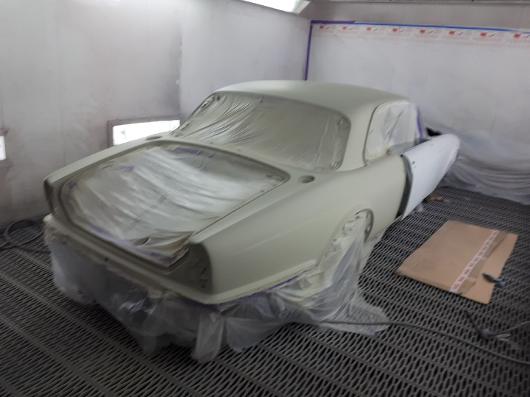
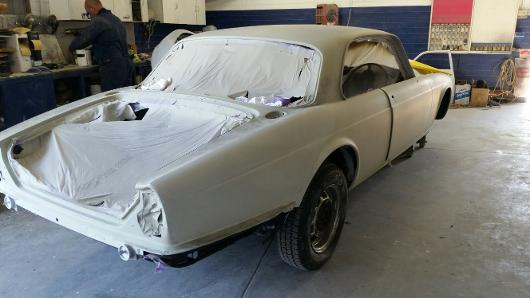
51. The body shell is almost ready for primer.
55. Thanks to Leyland the XJC panels were always a very bad fit. So getting them right takes considerable effort and patience. Having an experienced tin man who knows what he is doing does help.
57. Passenger side door and guard now fitted and gaped. Cleaned up and ready for primer. Gaps have come together beautifully. Helps to have a tin man who really knows his craft.
59. All gaps now looking good so we need to fit the bonnet and boot lid, (both from a Series 3 donor car.
40. Looking good! But the hard work is realigning the inner guard
42. The original seam between the sill panel and the rear quarter panel has been eliminated. This was the most practical way to make the sill repairs and rear arch modifications come together.
44. As anticipated the LHS sill panel and inner sill have suffered a similar fate to the RHS. Repairs required to the inner sill and full replacement of the outer sill required.
46. The RHS sill is in and complete, looking good.
48. Some finishing touches to the LHS rear quarter panel, then a little lead wiping and full metal finishing to complete this panel.
50. I plan to use a "Switchback dual colour" LED globe here. Parking light will be white and turn to amber for indicators when activated. Very sexy.
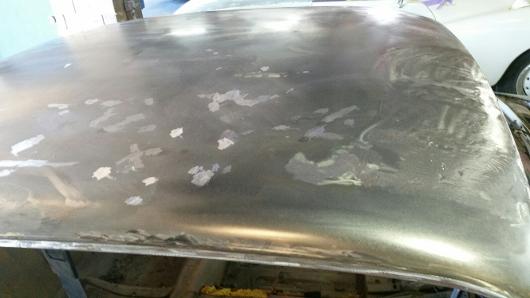
52. Arrrgh! Now I know why the previous owner painted the roof. Some rust to be dealt with. Never mind I plan to paint the roof.
54. Starting to think there is an end to this project after all.
56. In this case the extensive repairs to the top half of the door skin, the use of doors from a different car and the use of Series 3 front guards all added to the challenge.
58. The passenger side proved to be a little more challenging. But the end result is just as pleasing. Looking great.
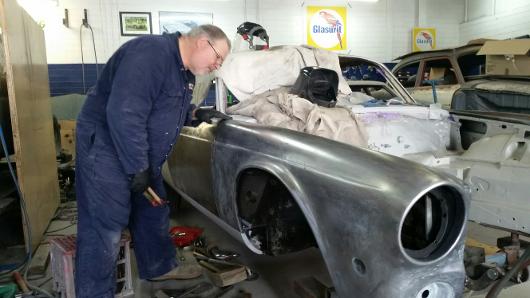
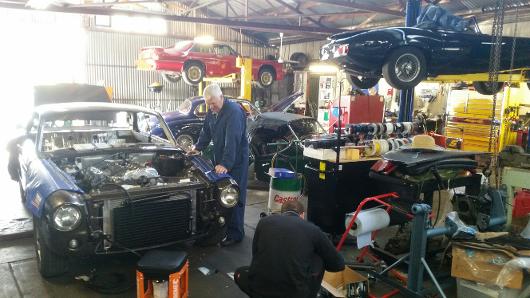
60. Meet Steve, the tin man with the magic touch. It is a pleasure to be able to watch steve work his magic with these panels. A tap here a big wack there, a little heat somewhere else and slowly it all comes together.
It is a pity that some of these trade skills are disappearing.
61. More primer on bonnet, boot lid, doors and front guards. Starting to look like a car again.
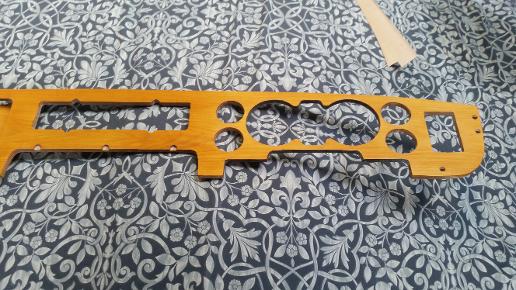
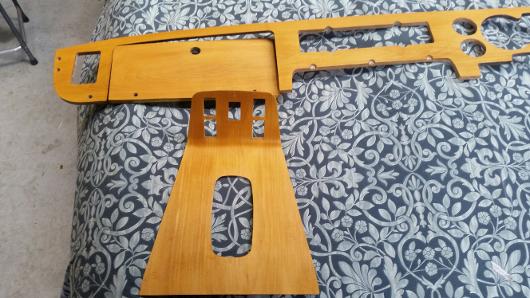
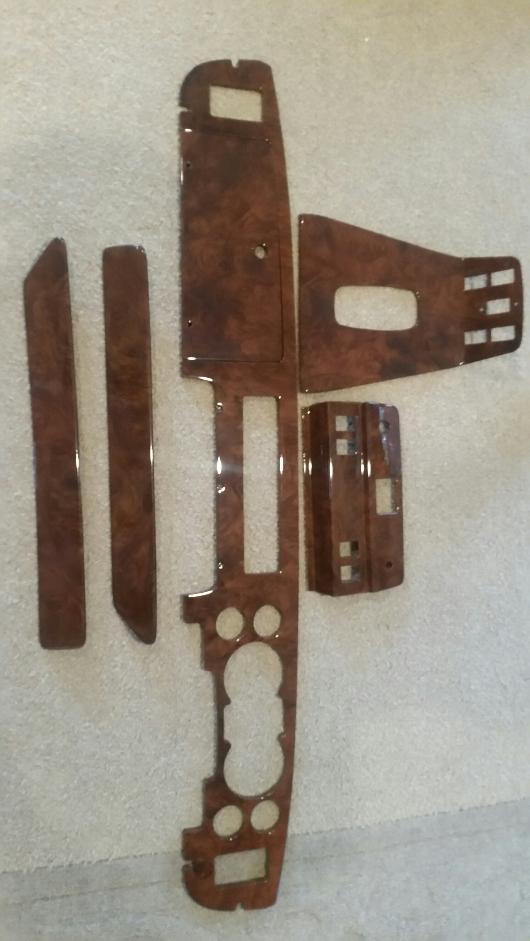
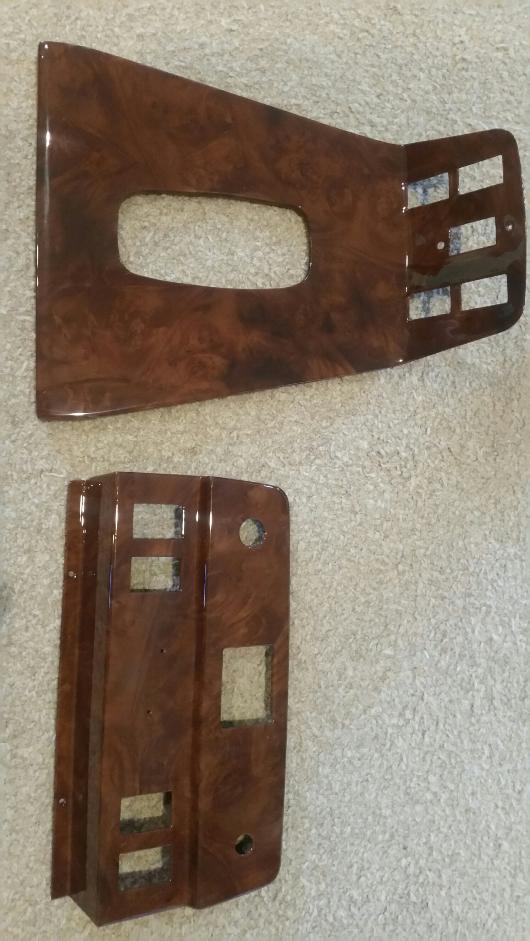
62. 2 May 2018 - A little bit of diversion therapy today. I decided to re-veneer the dash and other components including the ski slope. Using a light straight grained veneer instead of the traditional dark burl walnut. The final outcome will be a little darker than what the photos here depict. Something a little different that I think will compliment my choice of leather colour on the seats.
STOP PRESS: I have just abandoned this process in favour for a Hydrographic Film treatment of all timber dash pieces. I have yet toselect the timber pattern film/finish I will use. More to come on this.
63. 8th May 2018 - Progress........ looking more and more like a car every week. Final filler coat, now to block it down and apply the final primer before the colour starts to go on. Final colour will be a BMW colour, Sepang Bronze Metallic, Very exciting.
64. 21 May 2018 - More excitement. The final primer, now ready for a final rub down and then we see some colour. Whooooo! Engine bay, boot etc will be body colour. Under the guards will be a black stone guard.
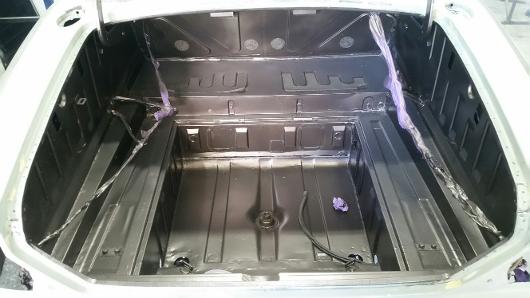
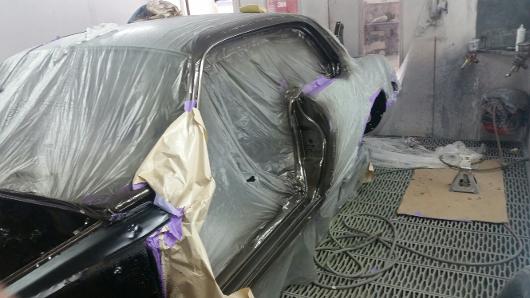
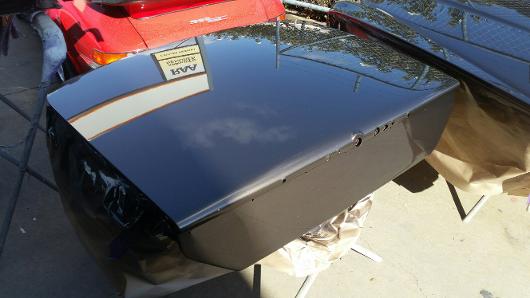
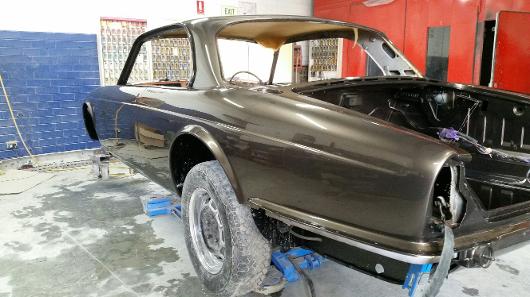
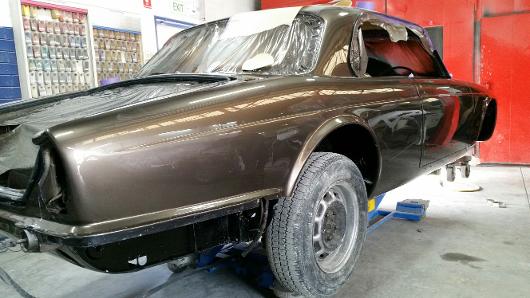
65. 28 May 2018 - Real progress today. First splash of colour (Sepang Bronze Metallic BMW) Engine bay, boot, and door sills as well as under guard seal. Apology for the photography as the car was in the paint booth under heat/lights. Love the colour!
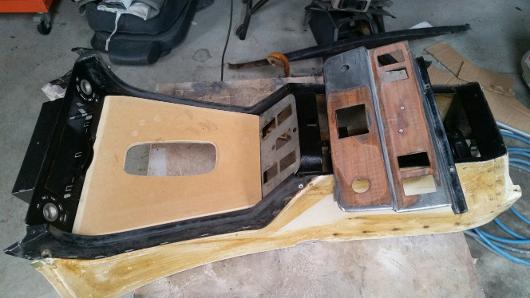
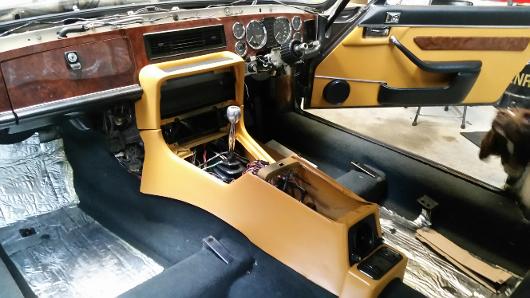
66. 29 May 2018. Iplan to use a Series 3 console and have started to repair one for use. I have stipped off all the old vinyl covering and foam underlay to reveal the true condition of the console. So many cracks and broken pieces to be repaired. Thank goodness for DEVCON, what a fantastic product for mending / welding plastic.
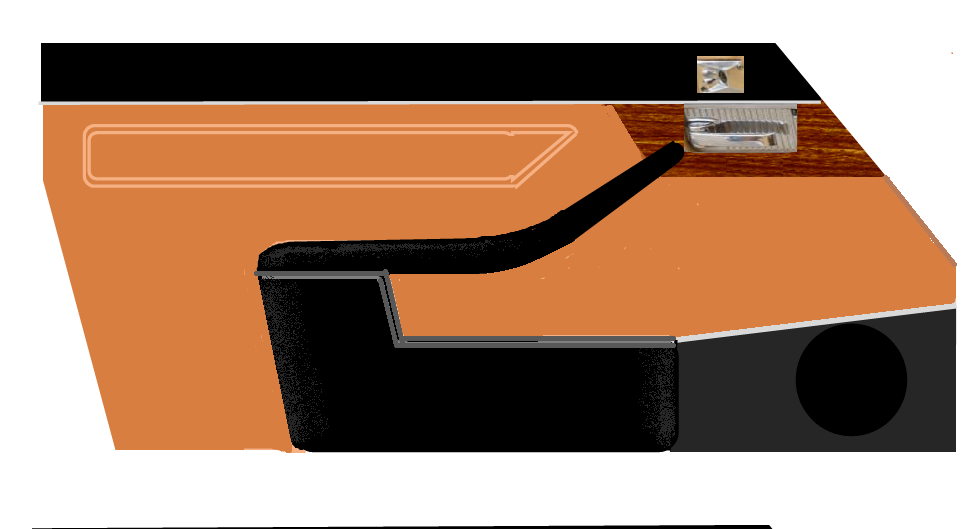
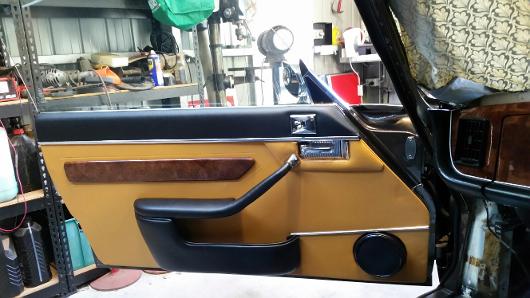
68. 29 May 2018. This is a mock-up of what I hope to do so far as the door cards is concerned. In particular it shows the remote control position for the remote mirrors and the Hydrographic timber treatment of the surrounds of the door handles. to match console and dash.
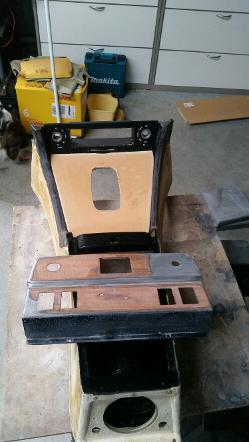
67. 29 May 2018. The plan is to have the console and the upper coin tray covered in leather to match the seats. I will resurface the ski-slope with MBF, removing the ashtrays and then have the whole ski-slope and vertical dash (around the clock and dials) and the main dash all treated with the Hydrographic film process in a wood grain pattern (yet to be selected.) I plan to also treat the surrounds of the door handles to match. More on this modification later.
69. 30 May 2018. Getting ready today for the final fit of doors and guards, ready for final paint. Doors and guards need to be hung so the all panels are painted in one go to ensure the best possible finish of the final metallic paint.
68. 5 June 2018. Today some of the final pieces were painted. Tomorrow final assembly of these panels and then a final polish. Hopefully the car will be home by the end of the week. Then the fun starts as I seek to reassemble the beast bit by bit. This is the really enjoyable part, polishing cleaning and painting verything bit by bit and the assembling. Just have to remember where and how everything goes together.
ggg
71. 6 June 2018. Final polish underway today. Fit the bonnet and boot lid tomorrow and re-install the re-built front suspension.
73. 8 June 2018. Finally home and tucked away in the shed where she belongs. Now the fun part starts.
75. 9 June 2018. - Commenced the re-assembly process today. It's fun to be able to pick and choose what I want to do. So I started with the front grills. Getting way ahead of myself I know. The lower grill fitted nicely without too many worries. I have still to decide if the surrounds of the upper grill should be black or chrome,

76. 10 June 2018. - Had a play toay, I say a play because this is hardly the most important thing to do at the moment. Fitted the new beehive type park/indicator lights.
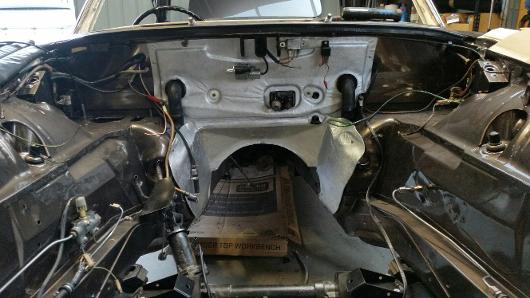
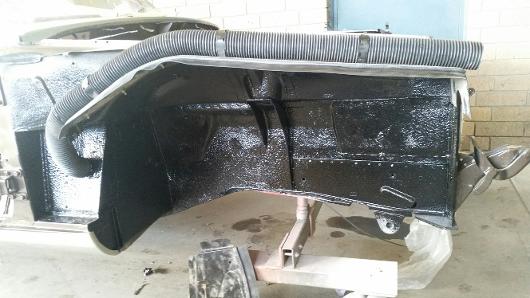
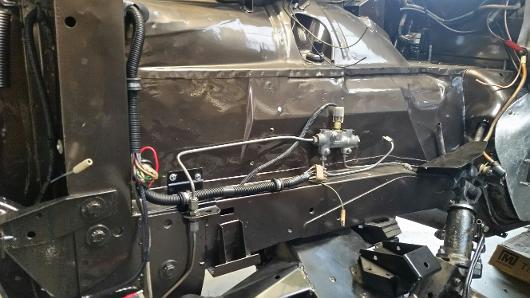
78. 15 July 2018. - Been a while since the last pics. The engine bay is my focus at the moment, getting the wiring back in and hiding as much of it as possible. All wiring and vacuum lines from across the firewall are now running inside the scuttle area out of site, emerging centrally to the re-located starter relay. Much cleaner.
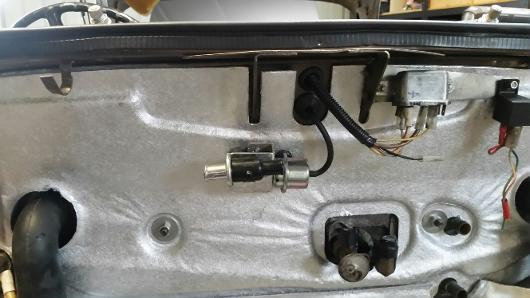
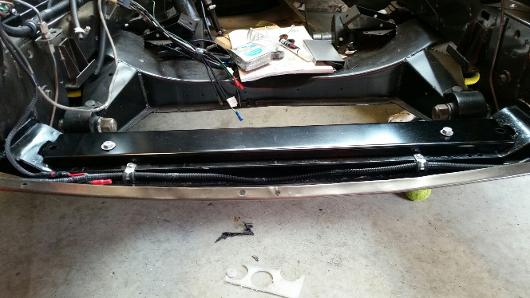
80. 10 June 2018. - The crisp clean firewall looks so much better without all the spaghetti dangling from one side to the other. I plan to make up a cover for the relays to finish it off.
82. 10 June 2018. - A trial fit of a new stainless steel front bumper indicates that it will fit very nicely after the usual packing and adjustments.
83. 11 August 2018. - Fitting door rubbers is my least favourite task especially when the rubbers supplied do not fit correctly, are too hard will not allow the door to go even close closing. (Pics Right)
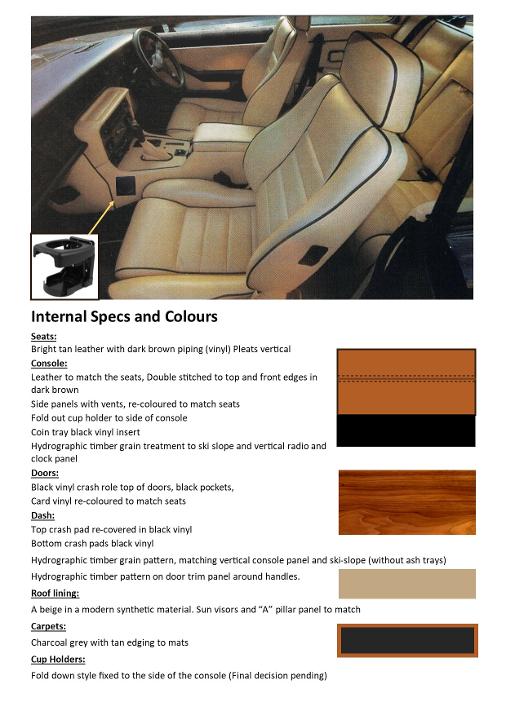
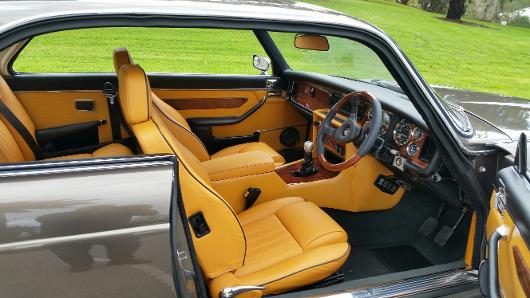
69. 5 June 2018. - I have been giving some thought to my final interior colour scheme. This palette gives some idea of my current thinking. The main photo shows XJS seats and a series 3 centre console to match the seats just as I have planned except the ski slope will be timber grained finish to match the main dash. My leather colour will be a rich tan with brown piping. The door cards will match the seats but door pockets and top crash roll on the doors will be retained in black. Carpets will be in a dark charcoal grey and hood lining to match. A rich timber grain will be selected using the Hydrographic process.
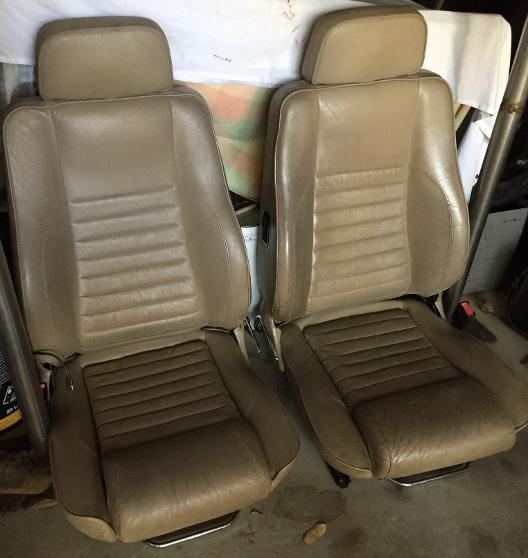
70. 5 June 2018. XJS seats in reasonable condition are not easy to find but this set I did find will come up a treat with some new foam and leather. I am considering fitting headrests on the rear seats as a special touch and something a little different.
72. 6 June 2018. I am loving the colour. When put in the direct sunlight it really pops with the bronze.
74. 8 June 2018. Made a start immediately with a trial fit of the new black mesh lower grill. The upper grill will match.
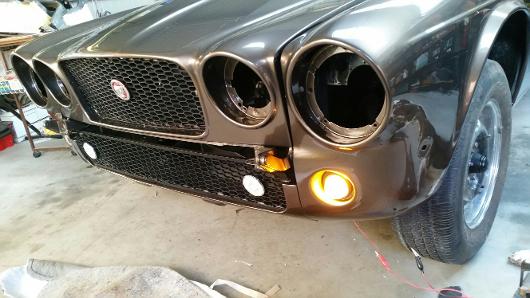
77. 10 June 2018. - These are what is called LED "Switchback" globes. They function as parking lights (white) and indicator lights (amber) when the indicators are actuated.

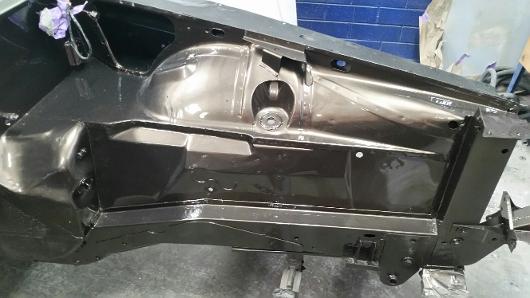
79. 10 June 2018. - The weasher bottle/reservoir is now located under the RHS guard behind the headlight and a remote filler neck and cap (modified Commodore) has been fitted the inside RHS guard. Headlight relays and modern blade fuses relocated from the top radiator panel are now less conspicuously mounted.
81. 10 June 2018. - The brake lines are now almost complete. I am planning some modification to the route of the brake lines from the master cylinder to the junction box.
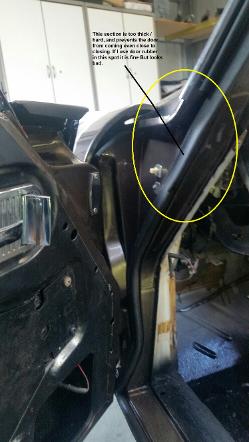
84. 11 August 2018. - As shown in the photo on the right I have used an alternate rubber in this spot (piece of used door rubber seal) that will allow the door to close. Unfortunately it has meant a join in the rubber seal.
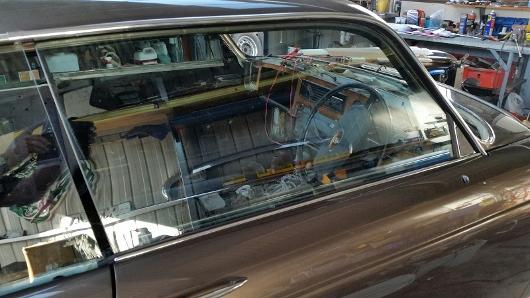
85. 11 August 2018. - Fitting the chrome trim and glass to the doors is much more rewarding.
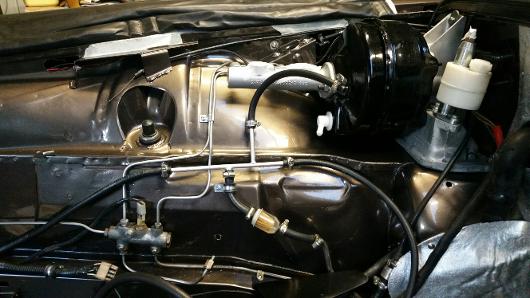
87. 17 August 2018. - The brake booster checked out all good. The brake master cylinder had been previously sleeved so just a clean-up and new seals. All installed today and re-routed the brake lines
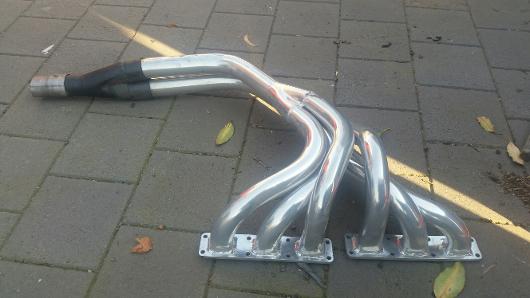
89. 10 September 2018. - This great looking set of extractors has been removed from the parts car and will look great in the new XJC. This will give me Triple 2" SUs, Series 3 Head with large valves and this set of extractors connecting to two 2" twin exhaust pipes.
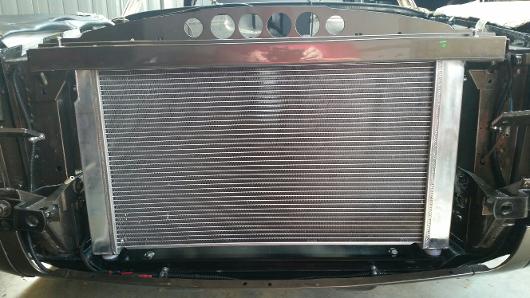
91. 13 November 2018. - I have decided to fit a Commodore VT V8 radiator in place of the original. A tight squeeze with a few adjustments to the base mounts.
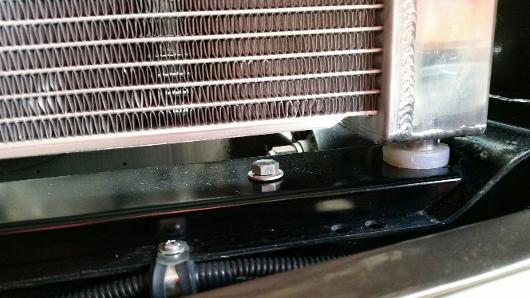
93. 13 November 2018. - The wider base provides a solid mounting spot with rubber insulators to reduce any chance of unwanted vibrations.
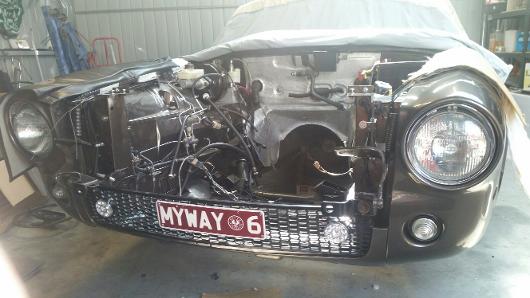
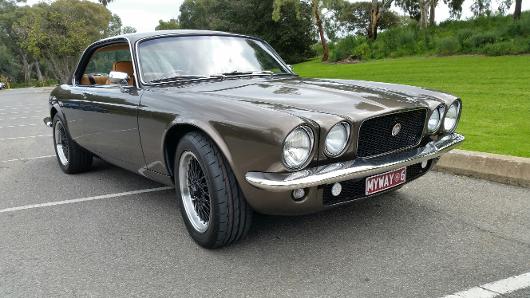
95. 24 November 2018. - Getting way ahead of myself I know but my new rego plates arrived today and just had to see what they would look like. The plates say it all.
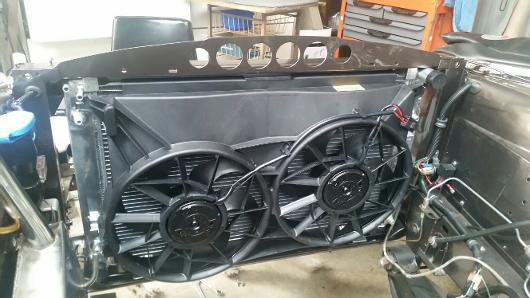
97. 12 December 2018. - Fitting thermo fans can be a challenge. With a Jaguar car, Holden Commodore alloy radiator and Ford AU thermo fans. But all fitted rather nicely with a few new brackets.

99. 5 January 2019. - Fitting the under tank panels also went to plan, although the passenger side gave cause for some grunting and cursing. The insulation in the exhaust tunnel also fitted.
101. 17 January 2019. - Earlier in this report I mentioned a change of mind whereby I decided to use the Hydrographic process for the dash and the console wood panels instead of veneer.
103. 17 January 2019. - Completing the front end overhaul and rebuilding the rear end. New mounting rubbers, radius arm bushes, brake rotors, calipers, pads, and hub bearings.
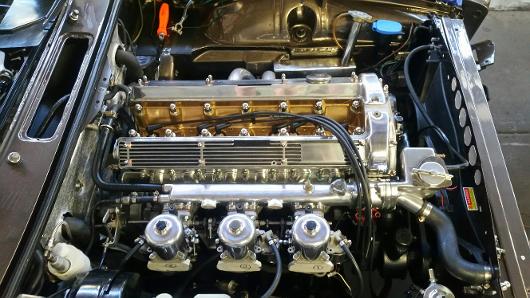
105. 14 April 2019. - More bling added today. Polished inlet manifold, polished carbs and polished cam covers. looking good.
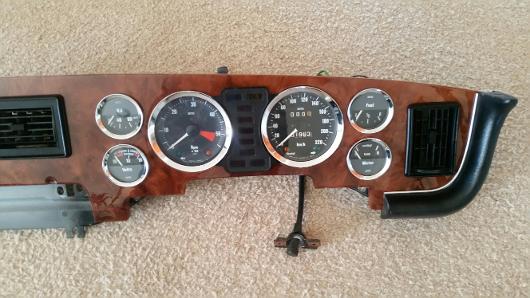
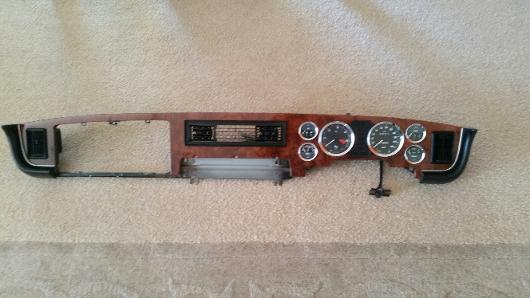
105. 30 April 2019. - Some progress with getting the dash back together. New chrome bezels look great. I have used a series 3 timber dash so it is necessary to use a Series 3 warninglight cluster
107. 30 May 2019. - I have sourced a one piece Series 1 rear bumper. Had to adjust the mounts to fit and weld up the aperture for the licence plate light. Now waiting to be chromed.
113. 19 July 2019. - It is exciting to get started on the interior. Passenger door cards and arm rests etc in place.
86. 11 August 2018. - The rear quarter window chrome bits presented some challenges, but came together OK.
88. 10 September 2018. - Very satisfying morning removing the engine from the XJC parts car. Now to clean it up and paint and polish ready for installation.
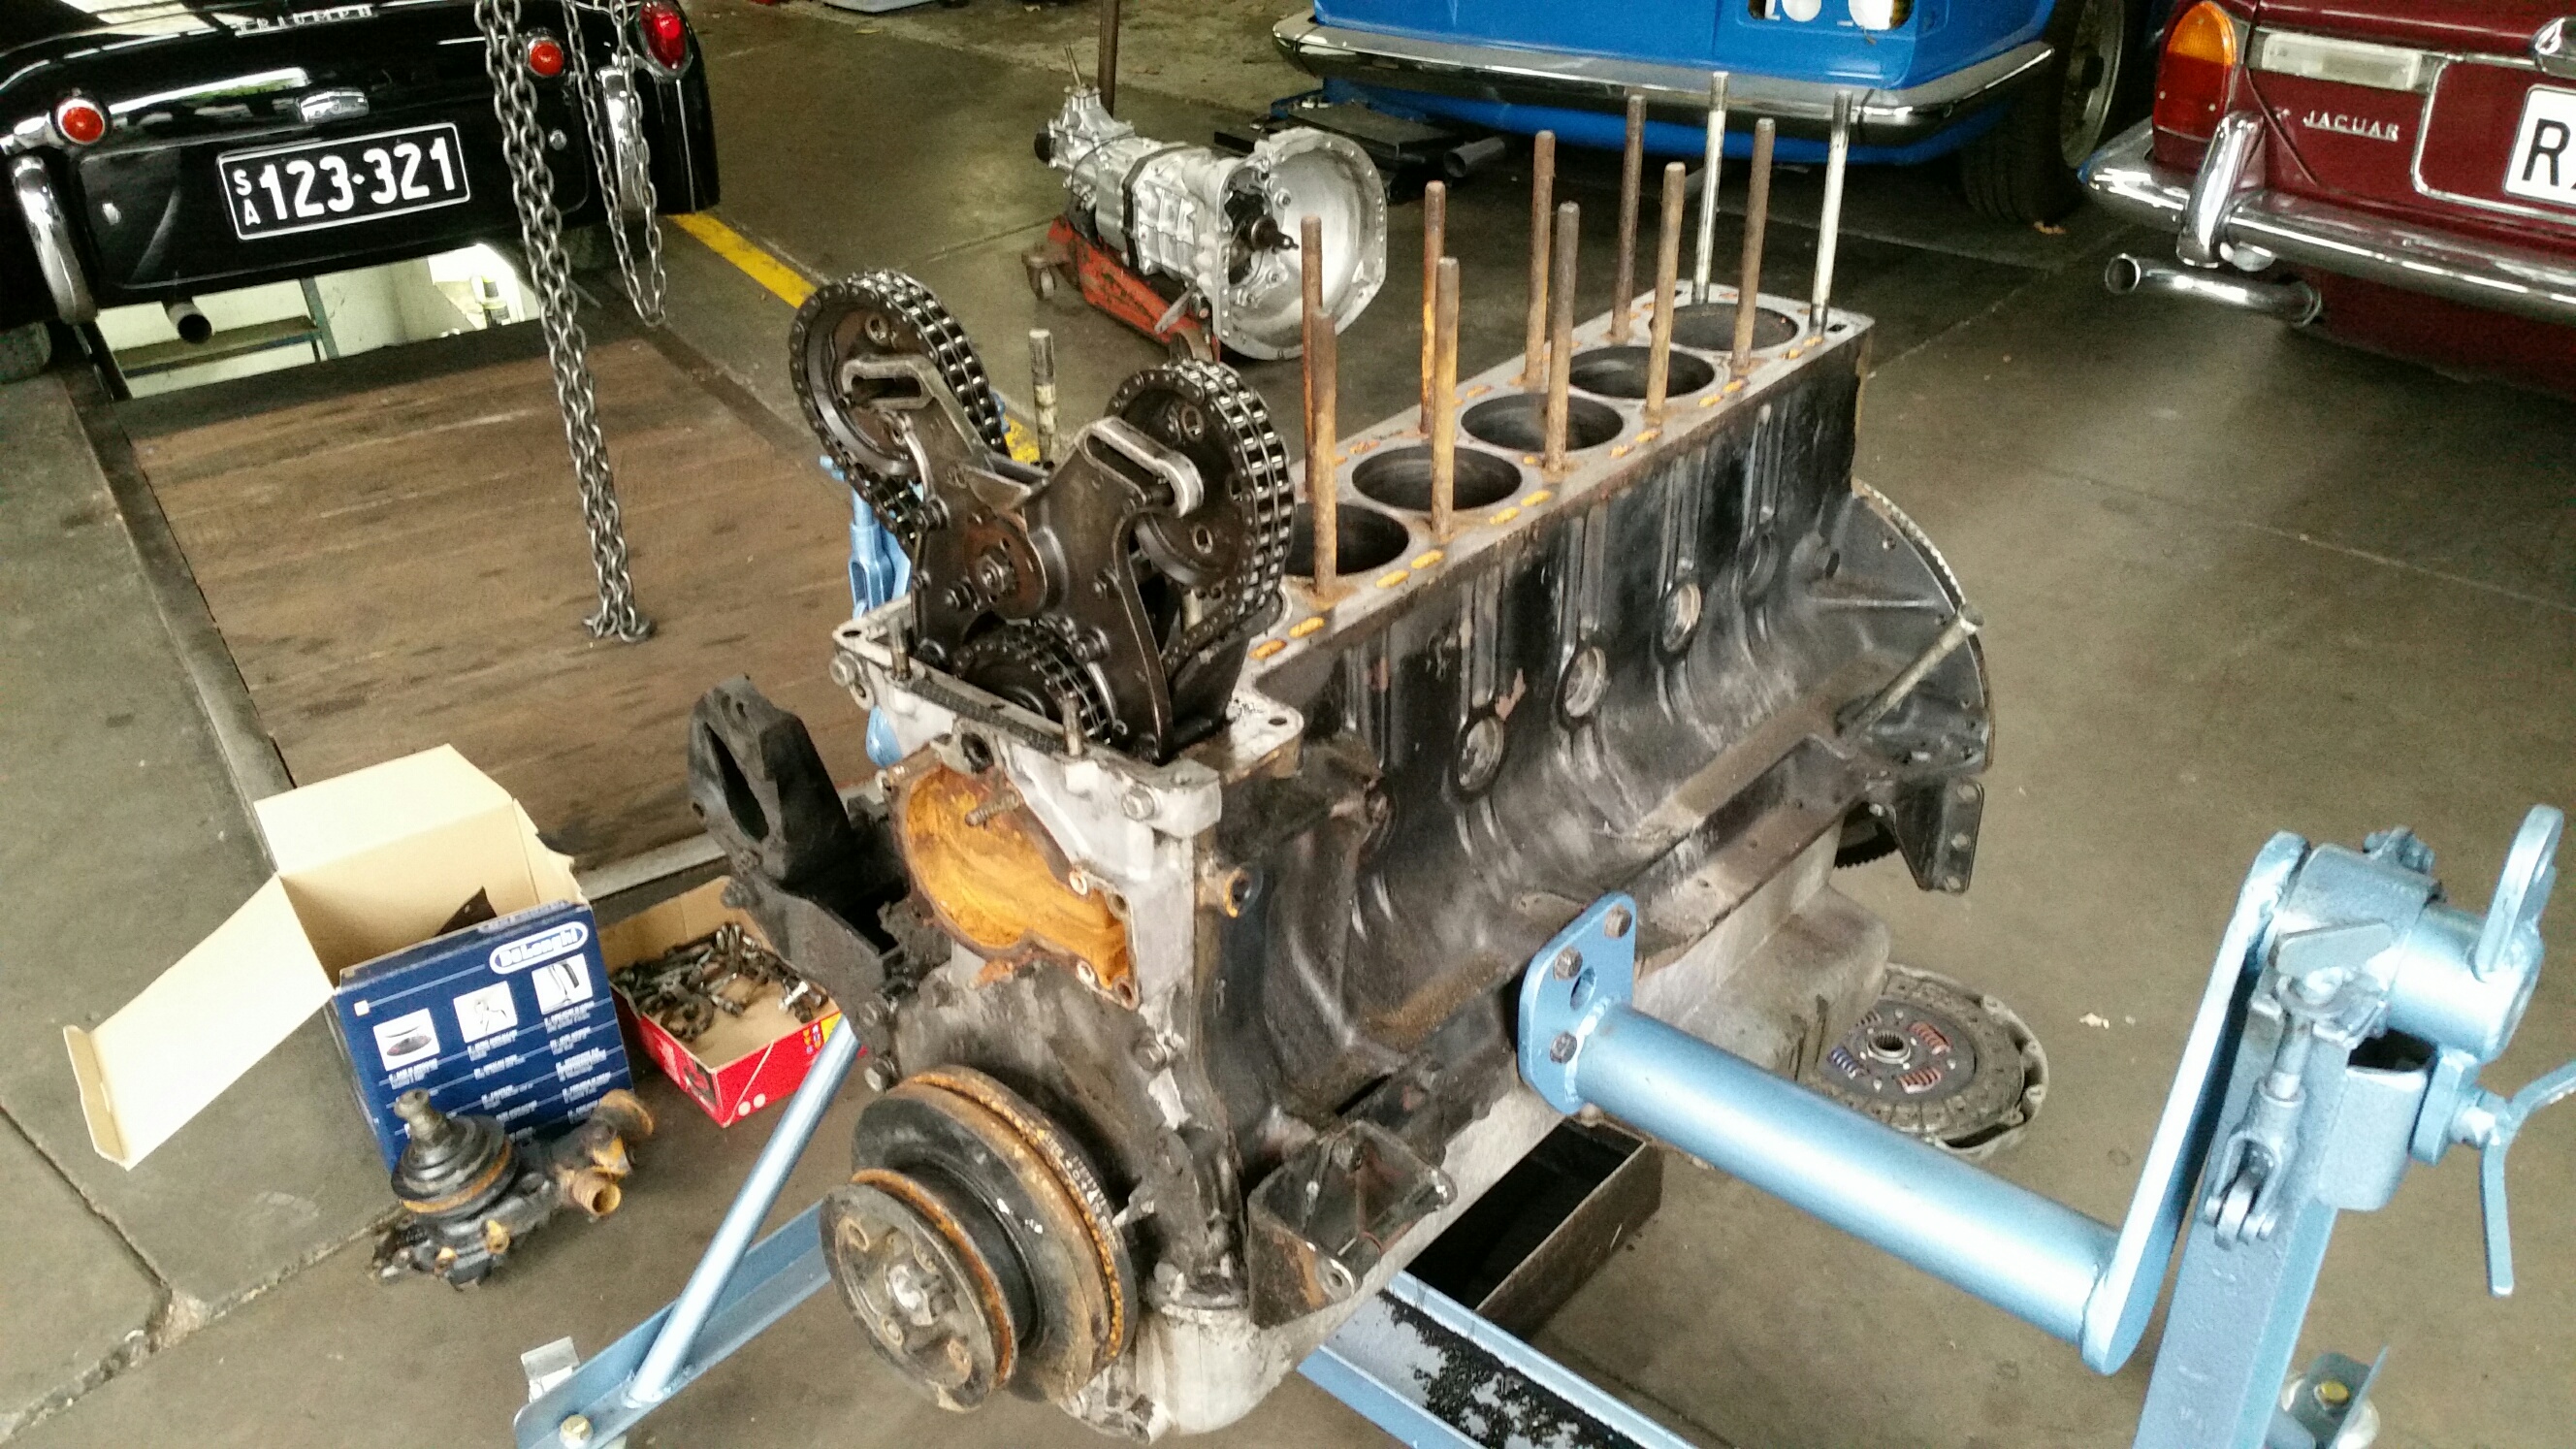
90. 13 October 2018. - Decided to take the more cautious approach and inspect the motor before installation. Good move as with the removal of the head I found 3 cracks between the bores. This now means a full rebuild.
92. 13 November 2018. - The bottom cross member has been raised by 17mm. This provides the necessary width to accommodate the wider mounting pins.
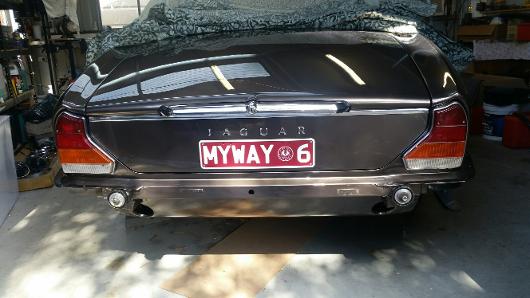
94. 24 November 2018. - The rear end is taking shape with a Series 3 boot and plinth fitted and Series 3 tail lights. One piece Series 3 bumper to come. Could not resist trying the new rego plates.
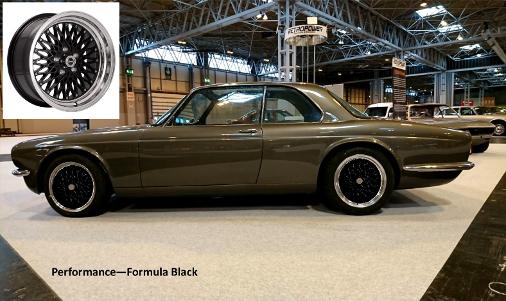
96. 5 December 2018. - Today I ordered these Performance Formula Black wheels in 17x7. Planning to use Bridgestone Adrenalin RE003 225/55/17 tyres.
98. 5 January 2019. Happy New Year! - Fitting the tanks went rather smoothly today. This isa job that is so much easier with a second set of hands.
100. 5 January 2019. - The filler caps fitted nicely on both sides and drain hoses all in place. These drain hoses ensure the filler caps recessed area drains after rain. ensures no water to the tanks.
102. 17 January 2019. - These two photos show the finished pieces. Very pleased with the result and cannot wait to see them in place in the car.
104. 26 February 2019. - Some more progress with the rebuilt motor and Supra 5 speed installed.
106. 30 April 2019. - Very happy with the finish of the hydrographics. The contrast with the chrome bezels is magnificent. Now to get the glove box lid fitted.
108. 15 June 2019. - Getting close to come home from the workshop. Mechanicals almost complete. A/C being fitted up with new compressor, dryer, condenser, hoses etc. Almost ready for gas.
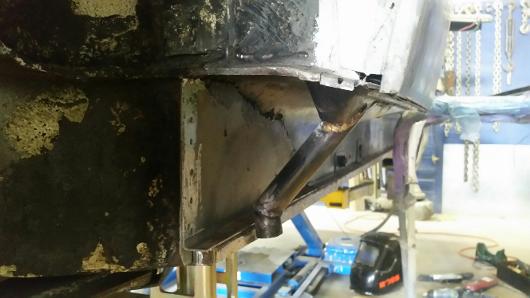
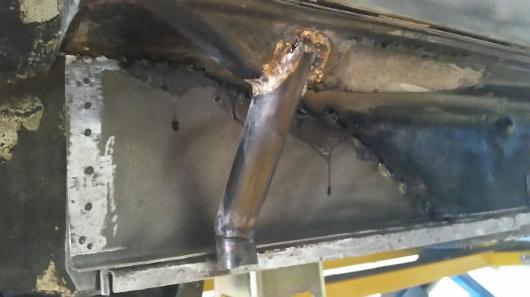
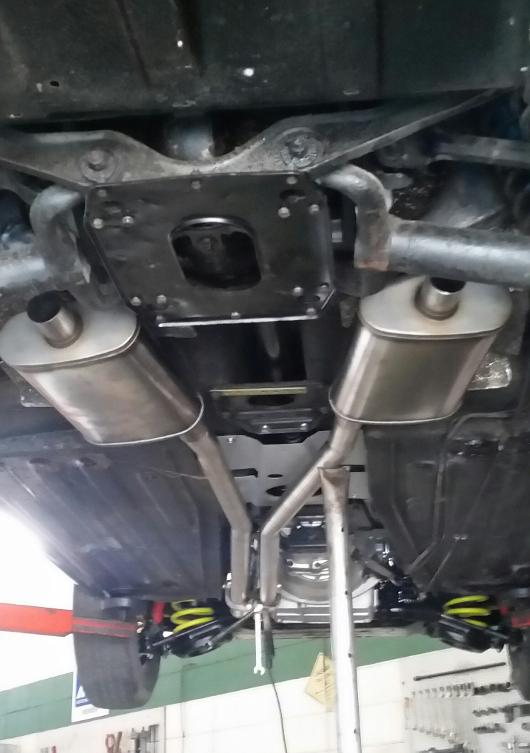
109. 15 June2019. - (LEFT) Fitting up a new stainless steel 2" exhaust system. So far so good. The plan is for the pipes to go through the rear cage under the half shaft and over the radius arm. All looks good so far.
110. 15 June 2019. - Exhaust now complete and sounding good with a deep smooth sound . . . . . . . just right! Some adjustments to be made once the suspension settles.
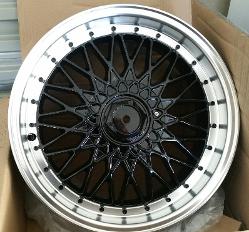
111. 15 June 2019. - After waiting 3 months for performance wheels, cancelled the order. Have now just received these OX688 Wheels, 17x7.5, +32 Offset in their place.
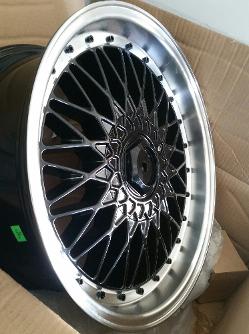
112. 15 June 2019. - I have spent a lot of time trying to work out the best thing to do with tyres on these rims. Finally have decided on Bridgestone Potenza Adrenalin RE003, 225/55/17. These tyres will be approximately 12mm larger in diameter to standard. Time will tell if I have made the right decision here.
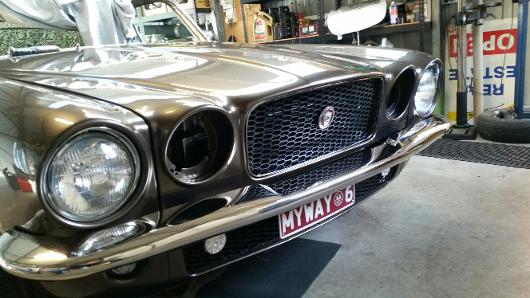
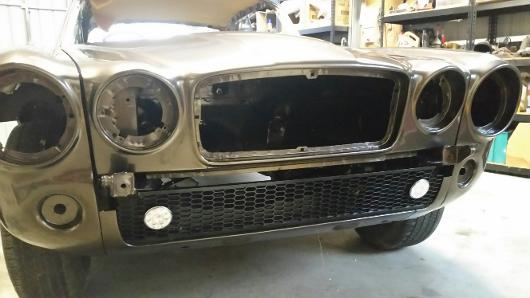
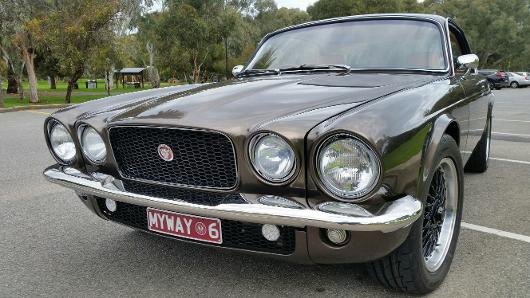
114. 20 July 2019. - Bonn back on, front bumper fitted, black mesh grill with custom chrome surrounds, all looking good. Waiting on some new headlights to complete the picture.
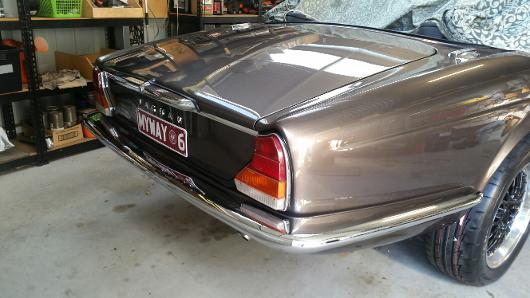
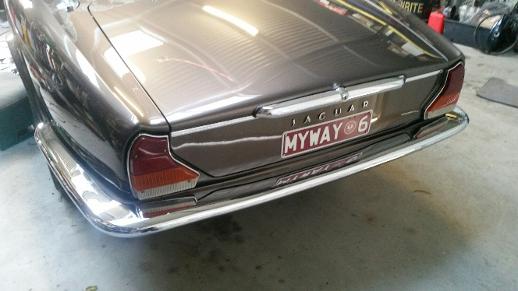
115. 30 July 2019. - Finally my Series 1, one piece bumper is back from the electroplating shop. Very happy with the finish and the final look of the rear of the car is now complete with clean lines, no over riders, minimum badges and short dump tips on the exhaust. Time will tell if this treatment of the exhaust causes problems with fumes in the car.
116. 11 August 2019. - This week has been all about the interior. Getting the Series 2 wiring matched up to the Series 3 window switches etc. in the centre console.
118. 24 August 2019. - Seats all in now. Front sliding rails need adjustment . . . . looking good.
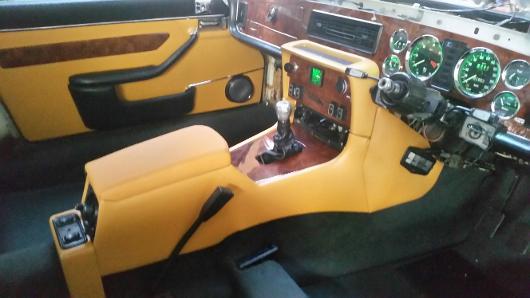
117. 11 August 2019. - Carpets now complete, and centre console (less a wireless) complete and all working. Replaced the rheostat control with a dual USB socket. Green LEDs in the instruments.
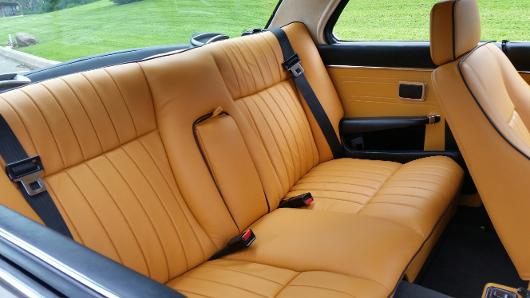
119. 24 August 2019. - Rear parcel shelf and rear seats in. Rear side panels and pockets all good. Seat belts fitted.
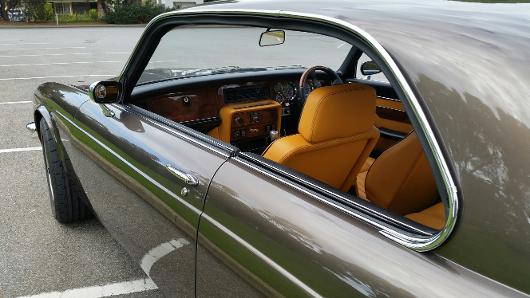
120. 24 August 2019. - Out and about for the first time today . . . . . . . . a few adjustments needed but I am a very happy man, feeling very satisfied!
WHAT WOULD I DO DIFFERENTLY IN RETROSPECT?
Not much really . . . . . . Maybe . . . .
1. Leave the rear wheel arches original, maybe with just a slight broadening of the flare.
2. Retain the original Series 2 tail lights maybe, more in keeping with the Retropower example at the top of this page.
3. Use a Series 1 V12 front grill with bumperettes . . . . . . this could still happen maybe . . . Project XJC 2.0 (below) Watch this space!